Stream presentation is key to engaging your audience. Having an appealing stream overlay package is a great step in providing a welcoming experience for new viewers. One way to make your stream more eye catching is to make your overlays dynamic. What do we mean by dynamic? Well, when you watch a stream like TeePee’s, where there is a moving hype bar or Nadeshot’s when an alert actually interacts with an overlay, that is dynamic. It is adding movement and animation to objects on the overlay. This can be as simple as a moving object around the static image, to fully animating portions of the overlay like an icon and having them interact with actions on stream.
In our older guide, we went over how to create static overlays to get new creators started with Twitch, Facebook, and YouTube stream overlays. But we know you. You are the go-get-em, top-shelf creator that requires a certain look to your stream! Simple overlays aren’t going to cut it. You are ready for the next step. So today, we are going to up the production level a bit and create our own dynamic overlays which we can then bring into OBS.
This tutorial will go over how to create a simple moving overlay. The goal is to show how you can easily create a dynamic overlay from a static image. For the graphical work, you can check out our previous tutorial on creating stream assets in Photoshop for instructions on the graphic design portion. We will not be going into advanced techniques like HTML/CSS/Javascript in this tutorial.
Software
First things first, you’ll need to find a video editor. We know that not everyone has access to Adobe Premiere or Sony Vegas. These are expensive video editing programs that not all creators need. At Webaround Gaming, we use HitFilm Express for all of our video editing needs! Hitfilm is a robust, free video editor that has an expansive feature list to make your edits look amazing.
We will be creating our dynamic actions within Hitfilm, exporting them out, and converting to webm format using FFmpeg’s WebMConverter. The WebMConverter is an open source program, so use this at your own risk.
We find that having access to Photoshop or GIMP will be helpful in creating some more elaborate graphical parts of the overlay. However, you can build out the full graphic within Hitfilm with a little bit of time and patience.
Services
While you can certainly put your assets into OBS by itself when finished, we find that using a service like StreamElements is the best way to host your files, reduce CPU load, and categorize our different assets easily. StreamElements is a free cloud-based streaming dashboard similar to Streamlabs. Unlike Streamlabs, which pushes their Streamlabs OBS program to host your assets, StreamElements handles this all online and spits out a URL to use. All you need to do is create your overlay, get the URL, and place it into a browser source in OBS! This simple approach is what we will use, but go whatever route you find is best for you.
Getting Started in Hitfilm
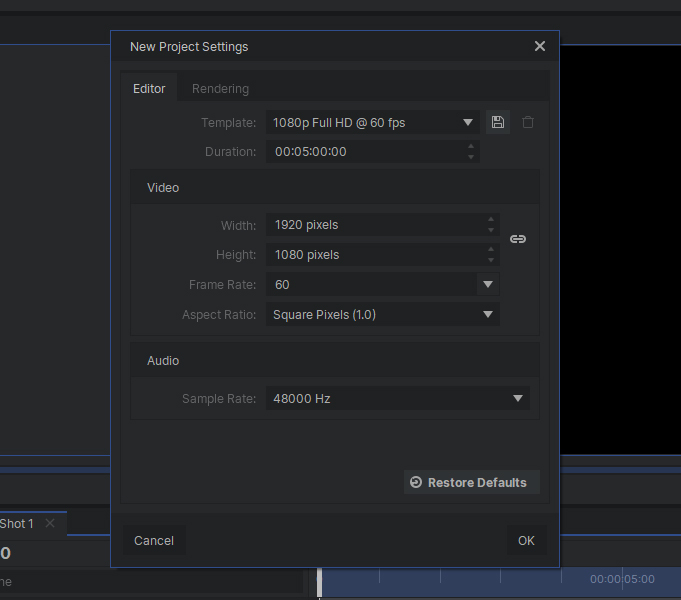
The first thing we want to do is figure out the size of our stream. For most creators with a baseline system, 720p 60fps or 1080p 60fps should be perfect. The size of your stream will determine the size we work in Hitfilm. For this tutorial, we will be using a 1080p stream.
- Open Hitfilm
- Click New at the top left
- When the New Project Settings window opens, place the following for the settings:
- Width: 1920px
- Height: 1080px
- Frame Rate: 60fps
- Aspect Ratio: Square Pixels (1.0)
- Audio can be 44000 or 48000 Hz (See our guide to stream audio for more information on the differences)
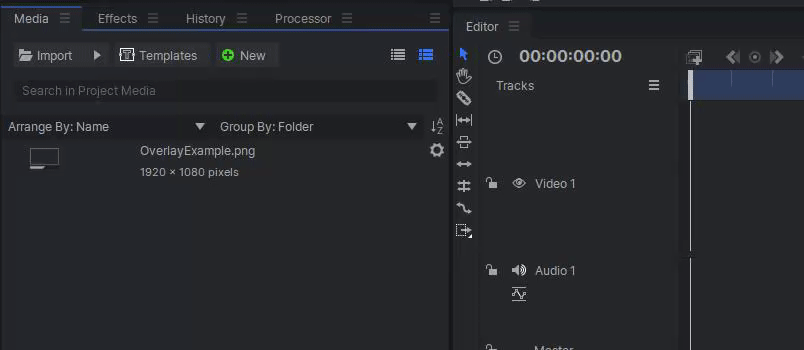
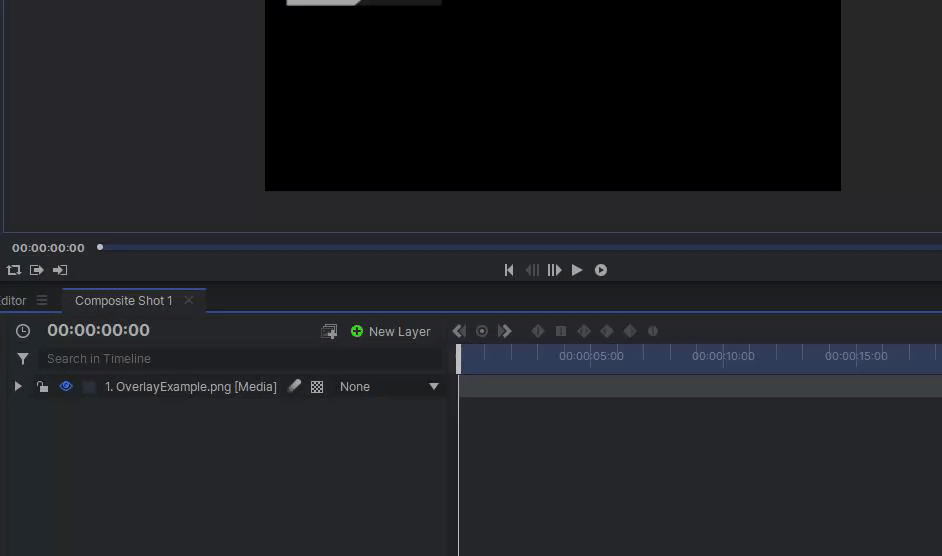
Next, let’s import a simple overlay that we created in Photoshop (or GIMP). Finally, let’s click the New box and create a Composite Shot.
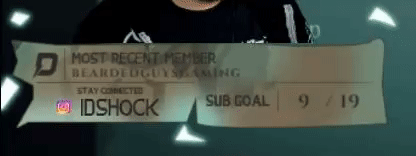
This is our starting point for the entire dynamic overlay.
Making the Overlay Dynamic
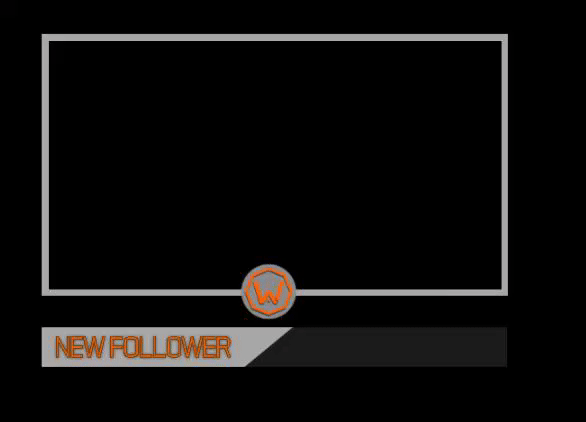
We want to make something that catches the viewers eye. So let’s make some moving lines that go around the webcam box.
In your newly created Composite Shot, we want to start by creating two plane layers that will be the moving lines around our overlay. These will be the lines that go on the left and right sides of the overlay box. We will eventually be repeating the process for lines that go over the top and bottom.
- Click New Layer
- Select Plane
- Name the new layer whatever you want and use the following settings:
- Width: 3px
- Height: 50px
- Color: White
- Click Ok
Let’s move the new line to the spot we want it to start moving. Once we have the placement correct, duplicate the line layer and move that diagonally up to the right side of the overlay. The goal is to have the left side line go up, while the right side line goes down. Its now time to animate the lines.
- Click on the arrow dropdown on the first line layer
- Choose the arrow dropdown next to Transform
- Select Position
- Next to the timeline, click on the circle icon to create a keyframe.
- Keeping position selected, drag the vertical timeline selector bar to 3 seconds. You can also use the “.” key on the keyboard. Each click represents 1 second.
- Click on the circle icon to create a second keyframe.
- Navigate to the line layer on the Viewer window and drag it upward so the bottom of the line is slightly above the overlay graphic.
- We made sure that we went above the overlay around the same distance as the line is from the left side of the graphic.
- Pull the vertical timeline selector bar back to the start and click play to watch the line move upward.
- Repeat these steps for the second line, except this time, the line will be dragged down.
We don’t want the lines to just appear, so let’s have them phase in while also moving.
- Click on the first line layer.
- On the Transform section, select Opacity
- Place a keyframe at the 0 mark.
- Change the opacity to 0%
- Drag the vertical timeline selector bar to time 00:00:00:24
- Place a keyframe
- Change the opacity to 100%
- Pull the vertical timeline selector bar back to the start and click play to watch the line phase in and move upward.
- Repeat these steps for the second line
You got the left and right lines going! Now just repeat this process for the top and bottom. If you did everything correctly, you should have something like this:
This is a simple moving object and not too complex. However, you can do a lot of cool things with this as a baseline. Instead of lines, you can have the overlay change color or even have objects move around. For me, I played a lot of Sea of Thieves on stream, so I made a cool moving parchment animation on my stream that mimic’d the Athena look on the gear. Using these basic techniques can add a cool flair to your static overlay. We recommend getting an idea of what you want your overlays to look like and start messing around in HitFilm to try and recreate that.
Finally, you’ll want to turn off the actual overlay graphic so you only have the lines going. This will help with the file size during export. Export the file as an Alpha AVI file.
Note that the file will be huge as it is uncompressed. Don’t worry! That is why we are going to run it through the WebM Converter. Not only will this compress the file very small, but it will keep the quality of the video in the process. We are going to take that file and upload it to StreamElements and create an Asset Rotator.
- Open StreamElements and Log in
- On the Dashboard, select My Overlays
- Create a new overlay with the resolution size that you selected at the beginning.
- At the bottom left, click the blue “+” circle.
- Select Static/Custom
- Select Image
- The Image Settings sidebar will appear on the left
- Click Set Image
- Upload your static overlay asset
- Click the blue “+” circle again
- Select Static/Custom
- Select Asset Rotator/Slideshow
- The Asset Rotator/Slideshow sidebar will appear on the left
- Click Add Asset
- Upload the .webm file of your moving object
- Set the delay to 0
- Set the Iteration pause to 10. This is how long the rotator will wait before it restarts the video. If you want to consistently have the lines moving around your overlay, set this to 0.
- Set “Show Images for” to however long the line file is for you. In this case, ours was 3 seconds so we will set 3 for this.
You should now have your overlay and the dynamic elements in StreamElements. Finally, when you are done tweaking, you can now copy the URL (located at the top right next to Preview), go to OBS and add the link as a browser source in your Source Panel. The dynamic overlay will now be present in OBS!
There you have it! This is the first step into making your stream more eye catching and dynamic. While we went over the basics of adding movement to a static overlay, you can take this knowledge to do a million other things with your overlays. Tweaking the overlays and messing with masks, effects, and other edits can make some really cool things like the Sea of Thieves edit that I did. In our next overlay tutorial, we are going to show how you can have alerts “interact” with your overlay in cool and unique ways. If you found this helpful, show us your new stream creations in the comments below!
As always, keep on creating and GLHF!


3 Comments
[…] for you to start with. Your stream may only need one stream label title, or you may opt for an animated stream overlay. It’s your stream, so you’ll know what is needed most for […]
thanks after sharing
thanks for sharing