As a content creator, making your voice sound the best it can is one of the most crucial pieces to a good live stream or video. Your voice is what most viewers hear during 80-90% of the content, so don’t you want it to sound amazing? Of course you do!
Lately, we’ve been touting the GoXLR audio interface as one of the best pieces of equipment for audio. It has the ability to provide phantom power, apply audio filters to your mic, and it has physical knobs that are handy for on-the-go audio adjustment. That said, the GoXLR is $500 and the GoXLR Mini is $200, which really isn’t what newer creators should be spending their hard earned money on.
However, what if I told you that you could add the functionality of the GoXLR system into OBS, for free? Well you can with VST plugins. Let’s dive into them!
What is a VST?
VST stands for virtual studio technology and they are plugins you add to third-party programs like Open Broadcaster Software (OBS Studio). These plugins allow you to add audio processing to your microphone (or audio sources) like noise suppression, compression, equalizers, and more.
Rather than being handled by an audio interface like the GoXLR, you can adjust them on your computer or in the program.
There are a lot of high-end brands that offer free VST plugins, which makes them easy to acquire.
Open-source software like OBS Studio have audio filters available without installing a VST plugin, but they lack the control and precise changes that a VST would provide. You may also know of an audio brand that has developed a VST plugin you’d rather use over the pre-installed OBS Studio audio filter.
How to install a VST plugin
The first step for installing a VST is to find a VST plugin that you want to add to your mic. There are hundreds of VSTs available, so take a look at what you want to achieve with your microphone. That said, we included some standard VST plugins that you’d typically want in a microphone like a noise gate, de-esser, equalizer, etc.
Depending on your third-party program, the process of installing and implementing a VST plugin is pretty straightforward. For our setup, we use OBS, which will be the open source software we will demo VST plugin installation with.
- .Install the VST plugin to your computer
- Follow the installation steps from the specific developer in the installer window.
- Open OBS Studio.
- Under the Sources box, right click on the audio source you’d like to apply the VST to.
- This will typically be your microphone.
- Select Filters.
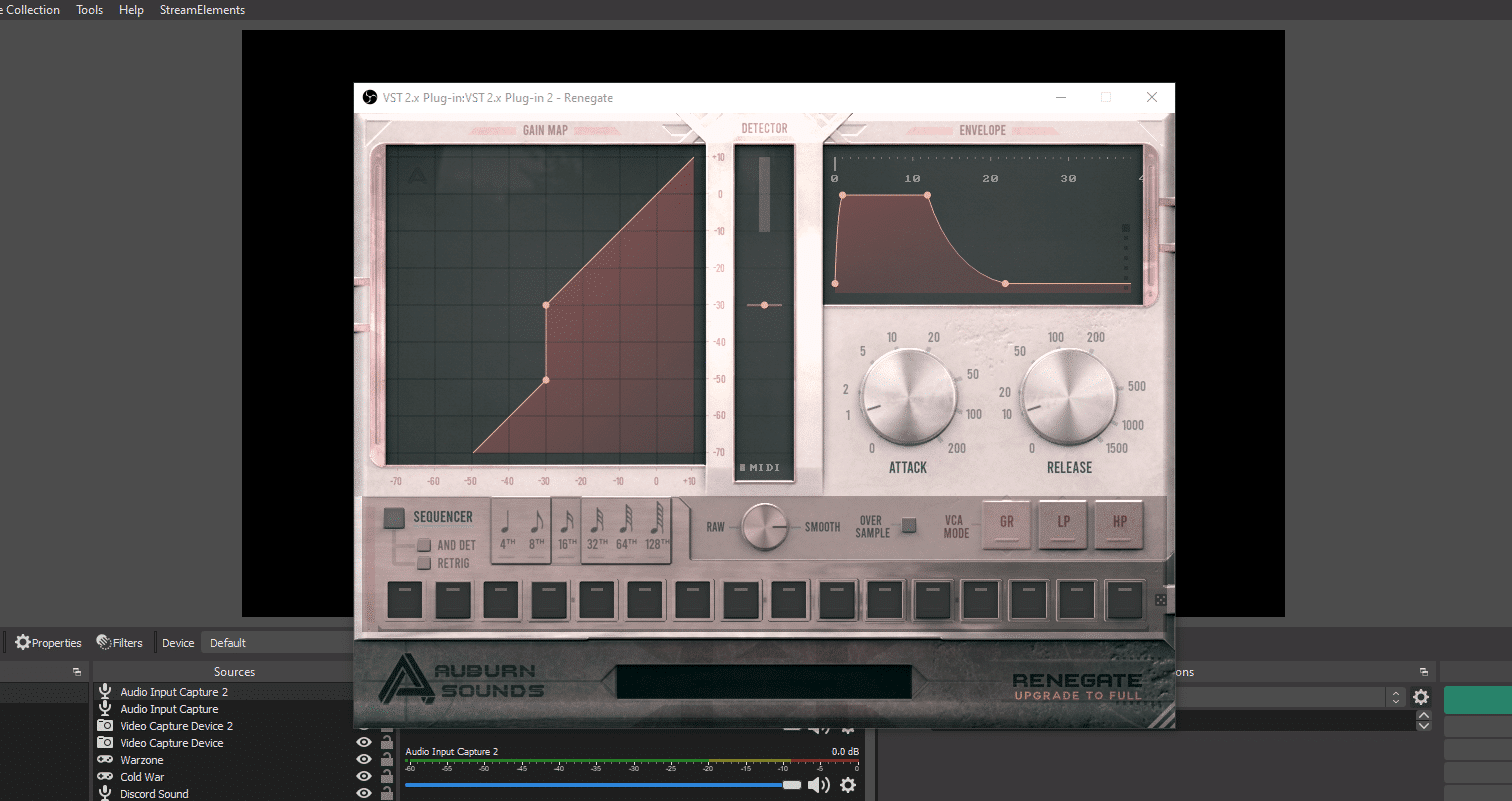
- On the left sidebar, right click, select Add, and select VST 2.x Plug-in.
- On the right section of the Filter window, select the VST plugin you’d like to use.
- Click “Open Plug-in Interface” to open the VST.
You’ve now added VST plugins for OBS! You can now adjust the audio source to however you want, within the VST plugin interface.
Problems with VST plugins
While VST plugins are very impressive, there are downsides to running them through your computer, rather than a dedicated audio interface.
First, VST plugins can be CPU intensive, depending on your computer specs and amount of VST plugins used. This will lead to a slight delay in your microphone that you’ll need to adjust for with another filter.
Secondly, VST settings are reliant on the program you are using. If your computer system is wiped for any reason, you’ll need to re-install the VSTs and reapply all of the settings again. However, OBS can be easily backed up with your settings to the cloud via StreamElements. Keep that in mind!

Finally, if you opt to use VSTs over buying a physical audio interface, you won’t get the hardware functionality with the effects. You won’t get the fancy knobs or switches to quickly change your audio source. Most of your audio mixing will be done via the third-party program in your computer.
You can link up the VST filters to a stream controller like Touch Portal or Stream Deck though. This will allow you to dynamically control the filters and audio sources to some degree.
VST plugins can be a great way to add that extra bit of customization to your mic or audio source that makes you sound great. While VST plugins do have their issues with CPU usage and lack of physical functionality, they more than make it up with integration and free, advanced customization that you’d typically pay $200 or more for.
Do you use VST plugins in your third-party application? If so, what plugins do you use? Let us know in the comments down below!
And as always, keep on creating and GLHF!
–
DISCLAIMER: Links included in this article might be affiliate links. If you purchase a product or service with the links that we provide we may receive a small commission. There is no additional charge to you! Thank you for supporting our blog so we can continue to provide you with free content!