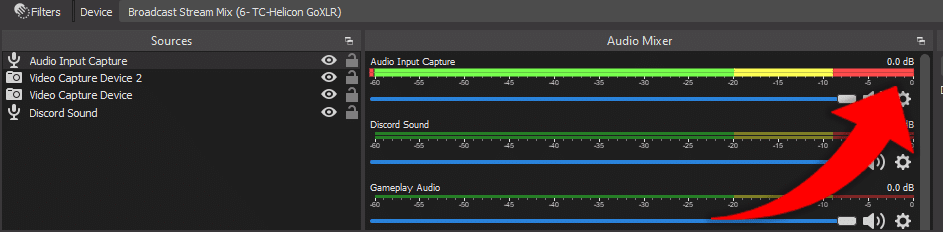
Have you ever had an insane moment on stream that got you hyped? So hyped that when you look down at the audio mixer, you see the red bar under your mic? Or maybe you are playing a scary game where sounds go from very low, to very high all the time.
When you see the red bar under your audio source, that means that specific source is peaking and it…kinda sounds terrible.
*Headphone warning*
We’ve preached on countless posts that audio is one of the most important aspects of a good stream. People can handle a lower quality camera, but audio can turn someone away in seconds if not dialed in correctly.
So how do you avoid the peaking? That’s easy! You just apply an audio filter called a Limiter.
What is a Limiter?
According to OBS, audio limiters:
…are used to prevent an audio signal from peaking above 0dB which can cause clipping and distortion. A limiter is a special type of compressor with a very fast attack and a very high ratio.
OBS Project, Filters Guide
Basically, audio limiter filters apply a gain reduction after a certain threshold, which ensures the signal of your audio sources doesn’t get too loud. It also allows you to keep your microphone or gameplay volume levels exactly where you want them and not having to account for the increase in volume output.
How do you apply an audio limiter?
Applying audio limiters to your sources is a pretty simplistic process within OBS:
- Open OBS
- Right click on the audio source that you want to apply a limiter filter to
- Select Filters
- On the left sidebar, right click, hover over Add, and select Limiter
- Make sure the Limiter audio filter is the last on the chain if you use other audio filters.

The audio limiter filter is now applied to the source. The real work comes into placing the correct Threshold and Release for the filter. These two components drive how the Limiter works.
The Threshold is the maximum output level that an audio source can hit. Once that level is hit or higher, the Limiter will begin applying a gain reduction to get the audio source output lower than the set Threshold.
The Release is how quickly the Limiter will stop the gain reduction after the level drops below the set Threshold. So for example, if you set the Threshold to -25db, the Release is the amount of time that the Limiter will keep reducing the audio output level after it reaches -25db or lower. The lower the release time, the quicker it will stop the gain reduction. The higher the release time, the slower it will stop the gain reduction.
What should my Threshold and Release be?
Finding your Threshold and Release numbers are unfortunately based solely on your setup and games you are playing. If you stream near a noisy area, you may want a Threshold that is much lower than 0db. Meanwhile, if you are in a relatively quiet area, the Threshold can be closer to 0db.
The same goes for the game you are playing as some games get very loud and then very quiet.
Testing your game and equipment is the only real way to find your optimal Threshold and Release numbers for your setup. You’ll want to ensure that while talking (or screaming), the audio level never goes into the red. If it does, increase the Threshold number until it is almost never in the red.
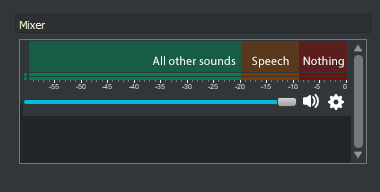
Photo Credit: OBS
For Release, we generally recommend keeping at the default 60ms. Its just enough time that is smooths out the gain reduction, while also not being an abrupt change to your audio output levels for the viewers.
When should you use an audio limiter?
There are many times where using the Limiter audio filter in OBS is ideal. If you find that your microphone or game volume are constantly being distorted or peaking, then consider applying a Limiter to them. Other times to consider adding an audio Limiter to your setup are if you do the following:
- Speak loudly in general
- Stream with loud animals in your stream area
- Find yourself yelling a lot (either due to hype or rage)
- Stream near a main entry door where people are coming in and out
- Use a sensitive microphone
- Use a loud, “clicky” keyboard and do a lot of actions or typing while streaming
- Play games where the volume dramatically changes from quiet to loud (usually found in the horror genre)
As we say time and time again, stream audio is critical to nail down first before you tackle any other aspects of your stream. Utilizing audio filters in OBS like the Limiter can ensure that your audio sources don’t peak and that clipping/distortion are kept to a minimum (or not at all!).
Make sure that you test out all of the pieces of equipment you plan to use within your stream. Your microphone is definitely the first to test with a Limiter, but also consider applying it to your Discord chat or even your alerts. Any sources that have varying levels of audio within them can be great candidates for a Limiter audio filter.
Do you use Limiters in your setup? If so, what audio sources do you have them applied to? If you don’t, are you planning to add them now that you see how important they are? Let us know why or why not in the comments down below!
And as always, keep on creating and GLHF!