Streaming is becoming a huge component of content creation and with that, more and more tools are becoming available to each creator. From livestream software, to cloud services for overlays, the options that are available to a creator are ever-expanding. There is one tool that is synonymous with livestreaming that provides immense value to anyone that uses it. Of course we are talking about Open Broadcaster Software (OBS). Today, we are going to go over OBS, show off the different parts of the software, and how get started using OBS! Let’s get into it!
What is OBS
Open Broadcaster Software is a free livestream program. This software allows individuals to load their overlays, gameplay, and other items they want to livestream and connect directly to Twitch, YouTube, Facebook, or other streaming services. Within OBS, there are a ton of features to make your livestreams stand out. You can create and upload transitions, countdown timers, and even upload browser sources for easy livestream viewing. You can also adjust all of your broadcast settings like frame rate and resolution to what your internet/computer can handle.
What Makes Up OBS
OBS is made up of four different sections: Scenes, Sources, Audio Mixer, and Controls. Each of these play a role in the overall look and feel of the stream.

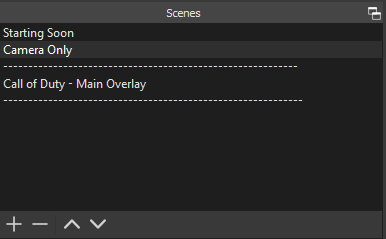
Scenes
Scenes are the different, well, scenes of OBS. They house the different sources your stream will use. You use scenes for a variety of reasons including Starting Soon scenes, Camera Only scenes, specific game scenes, browser scenes, etc.. For most new creators, a starting soon scene and gameplay scene are great starts.
Sources
Sources are the contents of the scene. This includes your overlays, music, browser sources, gameplay, camera view, text, etc.. The sources are tied to the specific scene so every scene may differ with the sources you use. You can add, delete, and edit the sources in this box for each scene.
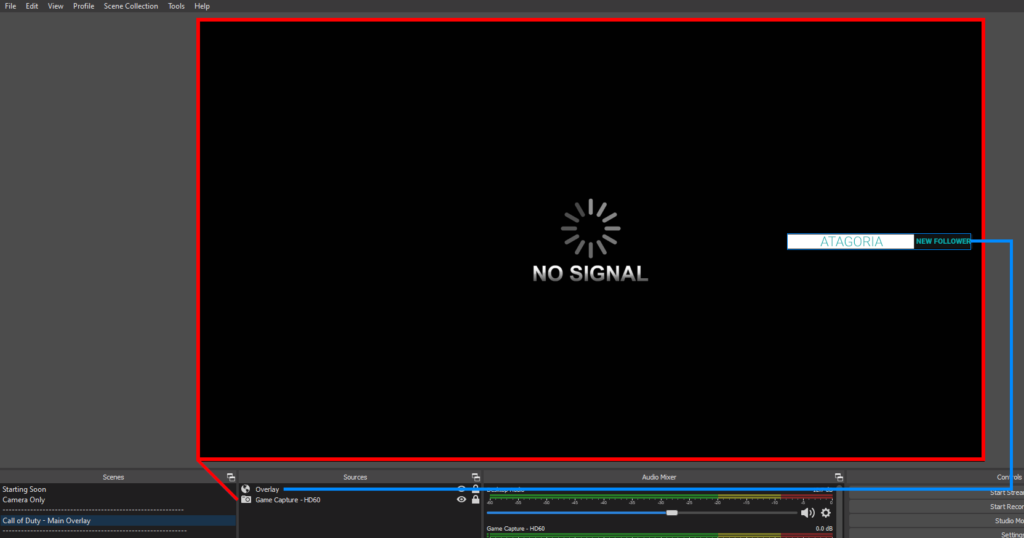
Audio Mixer
The Audio Mixer section is pretty self explanatory! Here you adjust the audio levels for your stream including your gameplay, desktop, microphone, and any audio sources you added to your scene. As well, you can also edit the properties of each here as well.
Controls
The Controls section of OBS is where the toggle buttons live. Here you’ll find the buttons to start streaming, recording, toggling studio mode, your settings, and exit. You’ll use this section when you start and end your streams or recordings. You’ll also use this to get to your stream settings menu. This is where you can change up your bitrate, resolution, and even assign audio tools like microphones to specific audio sources.
How to Use OBS
If you are an experienced creator, this section talks about the basics of getting started with OBS. For a more detailed look into OBS and its features, stay tuned for our advanced OBS guide coming soon. If you are a new creator looking to use OBS in your setup, you came to the right place.
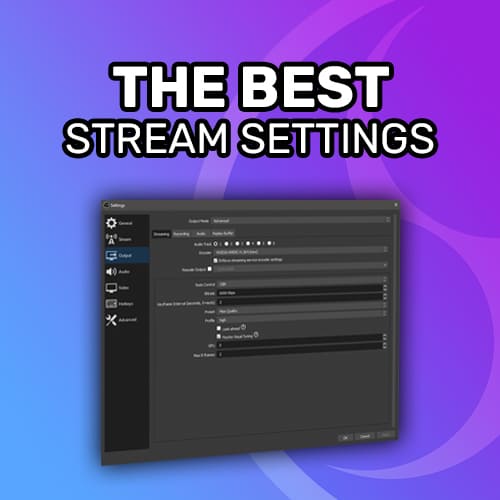
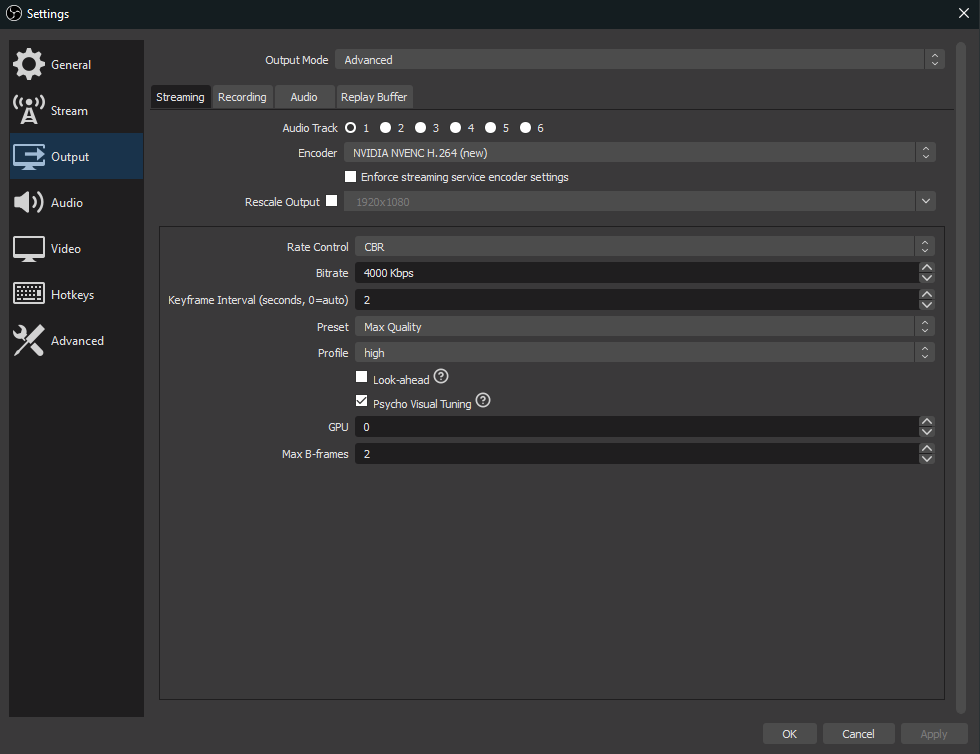
When you start using OBS, the first thing we want to do is configure your stream. To do this, we are going to start by navigating to Settings and selecting Output on the left sidebar.
The settings you choose here are reliant on your internet and computer that you are using. We will give a baseline setting for a computer running an i7-7700 CPU and GeForce 1070 graphics card. You will need to tweak and adjust your settings with your specific system in mind. All of these are in the Advanced settings in the Output Mode.
- Encoder: NVIDIA NVENC H.264 (new)
- Rate Control: CBR
- Bitrate: 4000 Kbps
- Keyframe Interval: 2
- Preset Quality: Max Quality
- Profile: high
- Look-ahead: unchecked
- Psycho Visual Tuning: checked
- GPU: 0
- Max B-frames: 2
Bitrate, which is the amount of data used to encode a single second of video, is important for quality. The larger the bitrate, the clearer the quality. It is directly correlated with your internet speeds as well, so if you have slow speeds, you may not be able to achieve 1080p 60 FPS. According to speedify.com, the following is a guide to quality and bitrate for what you can pull off based on your speeds:
- 1080p, 60fps: Bitrate should be 4500 to 6000 Kbps
- 1080p, 30fps: Bitrate should be 3500 to 5000 Kbps
- 720p, 60fps: Bitrate should be 3500 to 5000 Kbps
- 720p, 30fps: Bitrate should be 2500 to 4000 Kbps
Running a speed test will help determine the amount of internet that you have to dedicate to the stream. Remember you need to allocate some internet to the game so that you don’t lag while streaming!
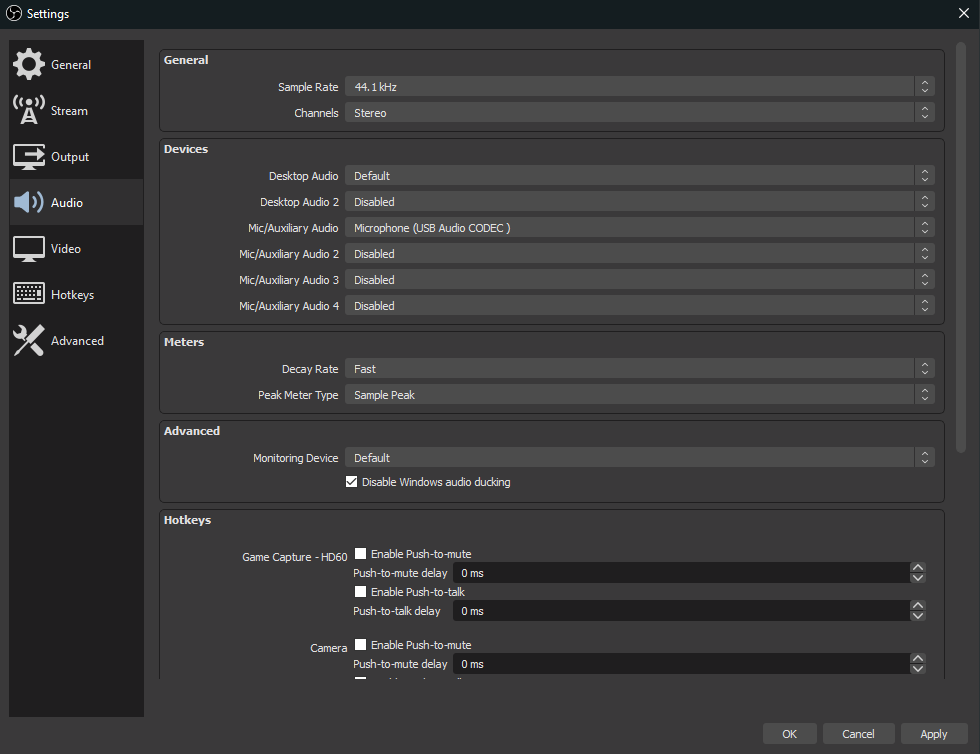
On the Audio tab, you can assign your microphone under Devices and change up the Sample Rates if you’d like. In our previous article on setting up your audio, we recommend staying around 44.1 kHz and 48 kHz.
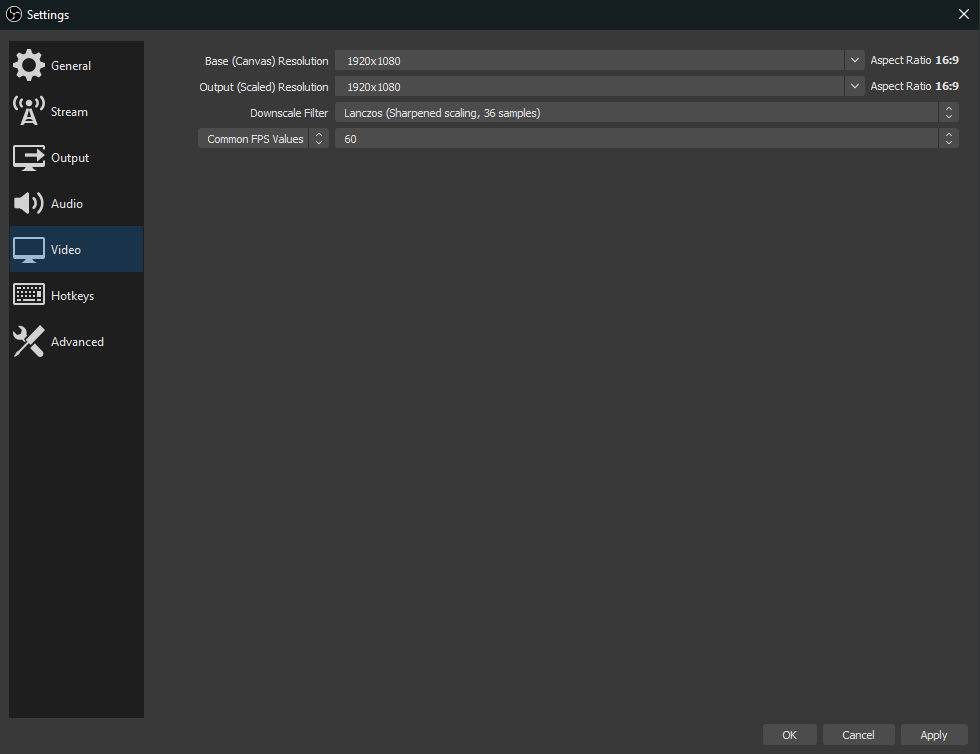
On the Video tab, you can adjust the output size of the stream. Here is where you’ll set the base resolution, output resolution, filter, and FPS. The base resolution is the size of the stream within OBS. We mentioned in an earlier article that when you are creating stream overlays, you want to make sure you know the resolution size you are working with. If you built your overlays to be 1080p, you’ll want to set that as the base resolution. Output resolution is what you want the stream resolution to be. This will be the output to Twitch, YouTube, Facebook Gaming, etc. If you want to only stream at 720p, 60fps, but created your overlays at 1080p, you’ll set the base resolution to 1080p and the output resolution to 720p.
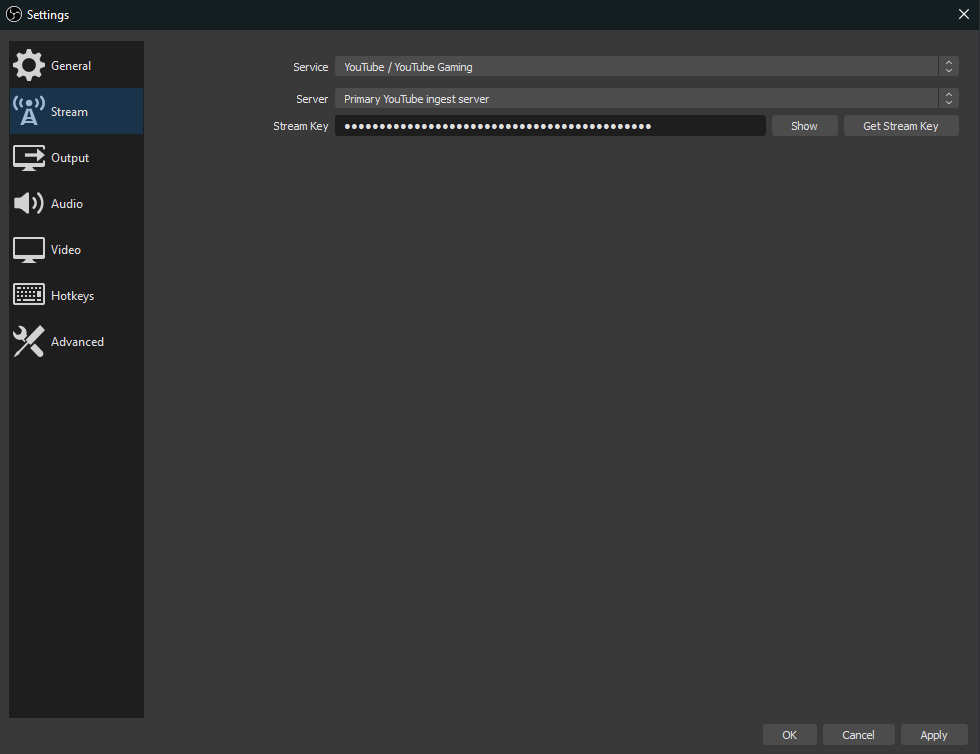
Finally, on the Stream tab, you can log into Twitch, YouTube, Facebook Gaming, or any other streaming service. This will auto populate your stream key, which is what allows you to go live on your channel. For those that don’t have a login, you’ll need to get your stream key from the specific platform, usually in your dashboard. You will come here after and plug that key into the Stream Key area.
When you are done setting up the stream settings, you can now begin making scenes and applying sources to those scenes. As everyone’s stream assets will be different from the next, we provided some quick tips below to get you started:
- If you are using a capture card to stream your gameplay from a console, you’ll find the option to add it under Video Capture Devices
- Create Scenes for the different parts of your stream. If you play multiple games, create a scene for each game.
- Make sure to lock your sources when you are done moving them so it won’t be altered on accident.
OBS is a super powerful tool for streamers. We recommend that you use the information above to get started, but also poke around yourself. OBS allows for community plugins and a lot of other features to make your stream stand out. But it also provides an easy-to-use platform for any type of creator to go live and look good while doing it. If you have other tips and things about OBS that we didn’t cover, make sure to let us know in the comments down below. We are always looking to update the blog with new and relevant information.
Until next time, keep on creating and GLHF!