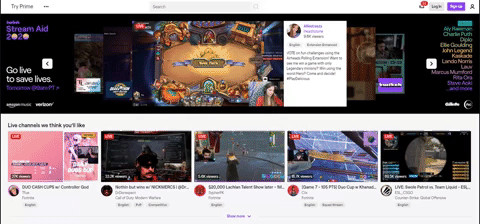
The world is changing. We are in a time where online video and livestream content brings in more viewership than television. Where online personalities are more well-known than some big time movie actors and actresses. When a 21-year-old can have an online business that pulls in 7 figures annually. The most insane part? Anyone can get involved! Twitch has brought a unique opportunity for individuals to showcase their gameplay completely live and provide the broadcaster with near instant engagement with their community. This platform has churned out some of the most well known content creators like Ninja (Now with Mixer), Dr. Disrespect, Pokimane, CourageJD (now with YouTube Gaming), and more.
But how do you start on a platform like this? What do you need to be successful on Twitch? How do you even start streaming on Twitch? Have no fear, we are here to answer all of your questions and get you up and running with your first livestream in no time! Let’s go through the basics and in future posts, we will explore the different pieces of equipment you can use, how to increase the quality of the stream, and more!
Create an account on Twitch
This is the easy part. Head over to Twitch and register for an account. It’s free and will be the starting point for everything. Once you create an account, you’ll have access to your livestream key, channel settings, security, etc.. We recommend going through each tab and setting up your channel how you like it. Some individuals like a lot of automatic chat moderation (where any derogatory word or phrase gets deleted automatically), while some like the options to allow or disallow certain things. Tweak your channel to what you value and how you want to run it.
Livestream Software
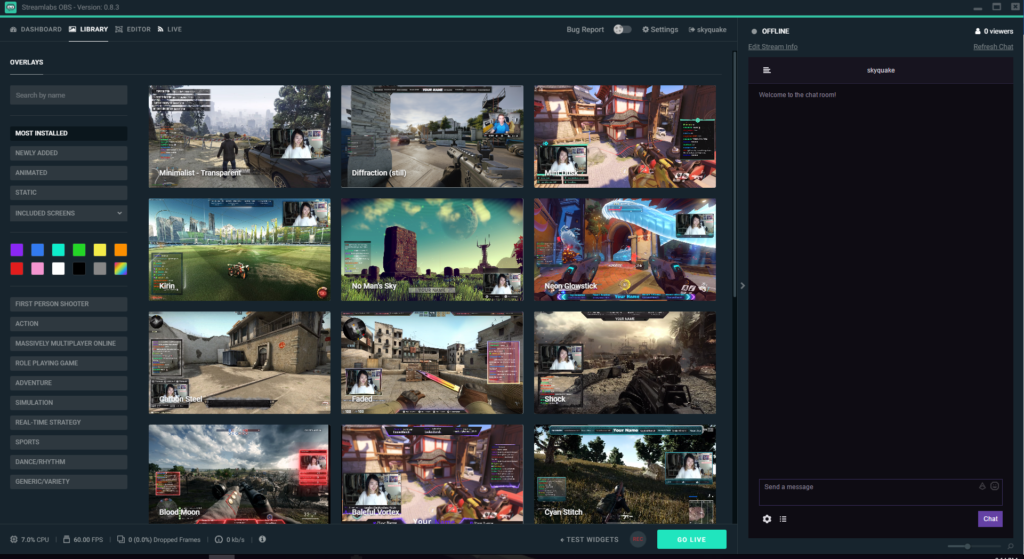
At the core of any livestream is the software. Its the brains that run the stream and host all of the elements that make up your content. From the overlay and alerts, to the quality settings and bit rate of your stream, all of it is ran through the software. Luckily for you, there are SO MANY PIECES OF SOFTWARE to use. Note that each piece of software will require you to tweak things like setting what is your microphone and the bit rate that you are using. Do some research on what your internet will handle and ensure that you have your primary microphone and webcam (if you are showing your face) plugged in and ready to go. Every software has their own pros and cons, but we will explore some of the largest ones and provide a quick overview of our thoughts on it. Let’s take a look:
- Open Broadcast Software
Open Broadcast Software (OBS for short) is the most well known piece of free livestream software available. It is an open source program that has been around for years, constantly being updated around the needs of the creator. OBS provides the single most customizable experience for any livestreamer. There are some powerful tools available in OBS that gives you the options to have your stream exactly how you want it.
Do you want to run a different transition for each of your games? Great, OBS has a transition matrix that allows you to set specific transitions to each scene. Do you want to have your scenes change automatically after a set time? Cool, use OBS’ Advanced Scene Switcher tool to change your scene automatically after a set period of time. These tools are fantastic and they have an even larger pool of community plugins that you can install to add even more functionality to your stream like an Instant Replay feature or even a skewing tool. The possibilities are endless.

With the robust nature of OBS, the major issue with it is that it takes a lot of time to learn. You can get a stream up and running pretty quickly on OBS, but really utilizing all of its tools and features can take a while. As well, you will need to provide all of your assets including: stream overlays (which we will touch on in a little bit), alerts, images, video, etc.. OBS is simply a software that helps host all of these assets and make them available so that you can focus on creating an awesome livestream show. Individuals that are not afraid of a challenge should look at OBS and see if the features it offers is something they would like. For individuals just starting out, who want the software to set itself up for you, look no further than our next software, Streamlabs OBS.
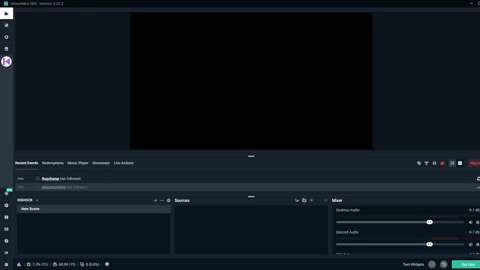
- Streamlabs OBS
Streamlabs OBS (SLOBS for short) is a free livestream software that was developed by Streamlabs, a livestream toolkit provider. SLOBS is a great tool because it takes all of the guess work out of your settings, overlays, everything. When you boot up SLOBS for the first time, it will ask you to log into your account and if you want to have them examine your computer specs and internet and provide the best settings based on that. Once they examine everything, they will automatically set you up with the best settings and you are on your way to going live.
One of the cooler features of SLOBS is its vast app store of free and paid overlays. We will go over assets in a bit, but you can select prebuilt overlays that include your webcam overlay, stream labels like Top Donation or Most Recent Subscriber, custom alerts, and more that automatically get added into SLOBS. All you need to do is put your webcam and gameplay in. Its that easy. If you don’t want to use their own assets, you can totally use your own and manually add each one.
SLOBS actually uses their own streamer toolkit, combined with base OBS that we talked about above. However, that doesn’t mean you get the awesomeness of SLOBS with all the features of OBS. Unfortunately, it doesn’t work that way. See the difference is that the community plugins and certain features of OBS are not available on SLOBS. Things like the transition matrix or instant replay aren’t features you can add to SLOBS. They don’t allow that. Individuals that have certain ideas that require certain features should check each software piece and see if they include that or not.
- XSplit
Our final major software for livestreaming is XSplit. Unlike SLOBS and OBS, XSplit does charge a fee to use its software. You can buy a lifetime membership, but it will run you a pretty penny at $200. What sets XSplit apart from the other software is that membership gives you access to all of their premium services like XSplit VCam, a background blurring software that gives your webcam the look of a DSLR, or XSplit Broadcaster, which is a livestream software that has a built in editor like SLOBS.
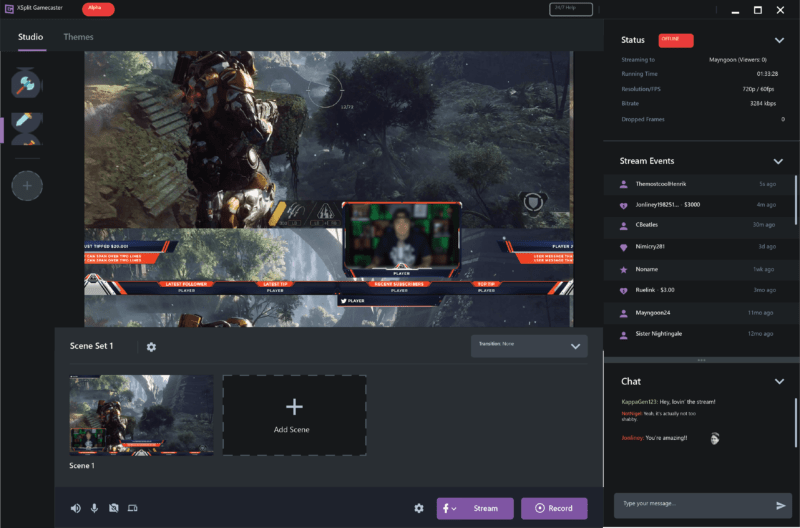
In most cases, we would not recommend XSplit for the beginning streamer as the upfront costs are a bit much for those just starting out. However, if you find its features helpful and prefer its interface to the others, take a look and see if it fits your needs.
Equipment
When you begin streaming, you don’t need the best equipment to start out. What we suggest is that you get your base essentials and build up your equipment as you go. Essentials for some will vary from the next, so we included some items that may or may not pertain to you. Think about the style of content you want to make and see what is available!
- Video Capture Card
If you are streaming on a PS4, Xbox One, or Nintendo Switch, you’ll need to buy a capture card to record and display your gameplay. For PC, you are able to record and stream without this device as you are pulling the gameplay from the computer itself. If you are playing on console, we suggest the AVerMedia Live Gamer 2 or the AVerMedia Live Gamer 4K. This capture card will allow you to get the gameplay from the console into software like OBS and SLOBS. Take a look at your current setup and see if a stand alone card or a PCI capture card that connects right onto your motherboard is best.
- Webcam
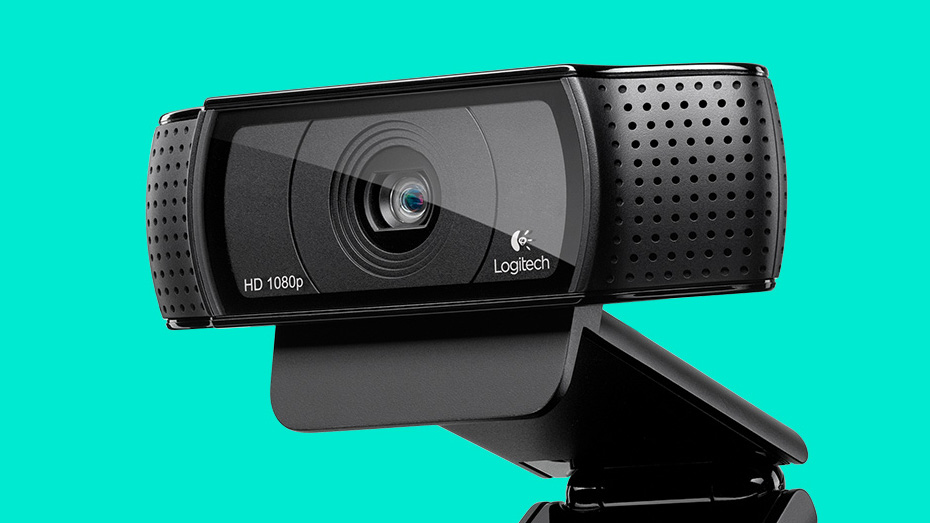
If you plan to show off your face, you’ll want to have a good camera to do so. We recommend the Logitech C920 or the Logitech BRIO. The BRIO allows for 4K 30 FPS while the C920 is 1080p 60 FPS. These cameras will give you a great look and when paired with your assets, will bring your stream together.
- Microphone
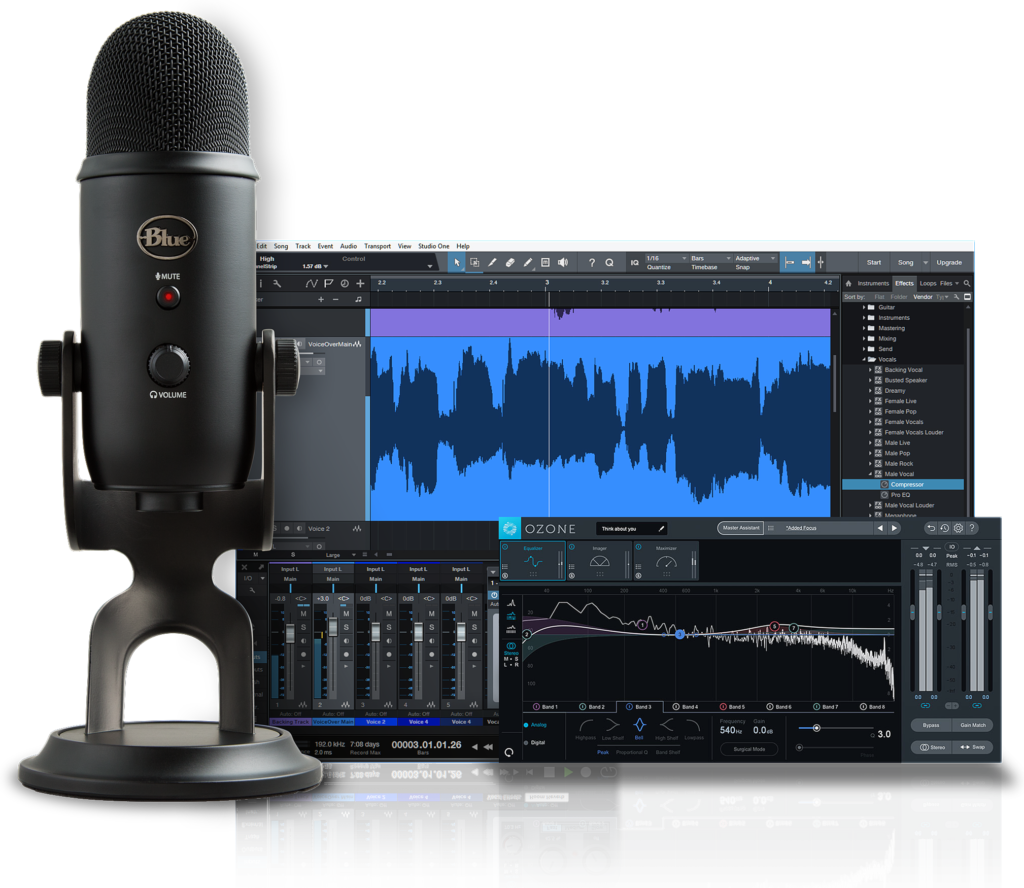
Engagement with your audience is key. If you aren’t talking to your chat while you play, they will get bored and leave. This is why a microphone is a key piece of equipment. The Blue Snowball is an inexpensive, high quality USB microphone that is plug and play. It provides a clear and crisp audio experience and isn’t expensive like an XLR setup. Consider this for space as well. It is a small form factor and fits on almost any boom arm. If you want something a little better, the Blue Yeti is a step up from the Snowball and is one of the best USB microphones available.
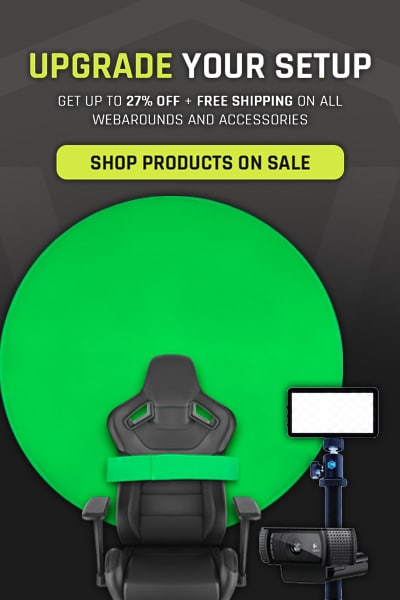
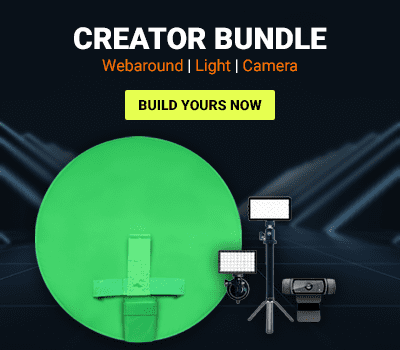
- Green Screen
We don’t want to toot our own horn, but the Webaround is one of the most easy and versatile green screen setups on the market. Not to mention one of the most cost effective solutions. If you want to add some production quality and not deal with huge setups, the Webaround Fan Favorite or Big Shot is the perfect addition to your setup.
Stream Assets
So you created your awesome account, chose the software that will help you accomplish what you want to do, now what? Well you have to make a decision on your graphical overlays. This includes your webcam (if you are using it), your stream labels like New Follower and Newest Donation, the alerts that you want to display, and more. There is no requirement on how little or how many pieces of assets that you have. It all depends on what you want. There are some that want a very minimal look, with just their socials shown, maybe a Most Recent Sub and Most Recent Donation label, and a small overlay around their webcam.
However, there are some that have advertisements being ran, call to actions every couple minutes, rotating overlays that show things like Most Recent Bits, Top Bits, Most Recent Donation, Top Donation, Most Recent Subscriber, Most Recent Follower, and more. When you are beginning, community engagement is key, so focus on displaying your top donation and most recent follower. You want to thank these people for helping you succeed and showcasing their name is easy. From there, decide if you want to make your own overlays, alerts, transitions, etc. or if you want to pick out some premade ones. Below are some suggestions that we found to help you get your overlays handled:
Make your own
If you are proficient in Photoshop and a video editor, consider making your own assets. This is great because you will be able to make the assets perfectly on-brand with your logo. You will not have to worry about editing the premade assets because you are making yours exactly as you want them. This can take time and some proficiency so be sure that you can learn or know how to do this before following this route.
StreamlabsOBS App Store
As we mentioned before, SLOBS has an app store of free and paid overlay packages that cover the spectrum of your needs. If you aren’t proficient in making your own, but want professional looking assets, look no further than here. They are constantly updating this marketplace with top tier packages and the customization is very good on most of them.
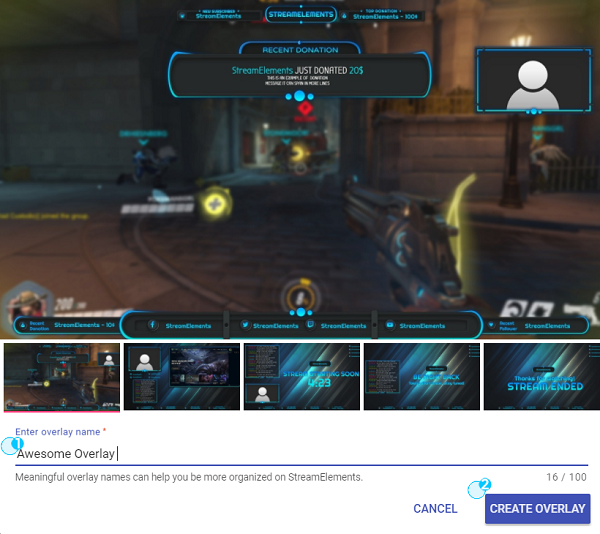
StreamElements Theme Gallery
StreamElements is a cloud based toolkit for streamers. It allows you to place all of your assets into their overlay editor and then it spits out a URL link that runs all of your assets. You just take that link into you preferred software, make a browser source, and place the link in that. Boom! The assets, alerts, and other visual aspects work right in the browser. The best part is that all of your assets are on the cloud, so if you stream from another place or off of your computer, all you need is that link and you place that into a browser source on your preferred software and you are done! It also takes a huge load off of your computer as the computer is only running the browser source, not each individual asset that could be gigabytes in size.
StreamElements has their own Theme Gallery built into their toolkit that, like SLOBS, you can import into your overlay editor and then customize to your needs. This free solution is great if you want to take a load off your PC and have professional looking overlay assets.
Visuals by Impulse
If you don’t mind spending a little bit of money, Visuals by Impulse (VBI for short) is a great creator of highly customized streaming assets. They take on client work and can create some of the most visually stunning overlays around. Creators like TeePee, CourageJD, and more rely on VBI for their overlays and they don’t disappoint. Be ready to spend $400 to $1000 per overlay package, but know that you are getting top-notch graphics.
Going Live
Alright, you have your overlays set and are looking great. Its time to go live. With most software, you are logged into your Twitch account through it so they synced your stream key already. All you need to do is click start streaming. If your key isn’t already put into the software, you’ll need to get it from Twitch. To get your key:
- Visit Twitch.tv
- Navigate to the top right and click your profile picture
- Select Settings
- Click the Channel and Videos tab
- At the top, your stream key is next to Primary Stream Key
Once you have that key, go to the settings of your preferred software and find the spot to post your key.
You are now ready to go live! Make sure that your scenes are set to where you want to start. Most streamers have a Starting Soon screen where they start their stream. Now this is where you begin to talk and show the world your awesome content!
Starting to stream is one of the most fulfilling and fun things that you can do. Whether it is for enjoyment or you want to make it a side hustle or even main source of income, this guide will get you started with everything you need to know. There is so much more to learn about livestreaming on Twitch and other platforms, including what equipment is the best and ways to really improve your overall quality. In the next couple posts, we will be exploring that and a whole lot more on livestreaming. Stay tuned and have fun! GLHF