Zoom and Google Suite are two powerful virtual work tools used by millions of professionals every day. The new Zoom for GSuite Add-On is the perfect solution for integrating both tools creating a more seamless experience while scheduling video conferences. Zoom for GSuite helps you “easily schedule, join, manage, and customize meetings” from Gmail and Google Calendar.
Some key features include:
- Schedule a Zoom meeting and bring in important details or documents from an email in Google.
- Automatically add Zoom meeting details to your Google Calendar event invitation with one click.
- Easily customize your meeting options.
- Create a centralized hub to manage Zoom for your organization or company.
In other words, this add-on is the best way to add conferencing details for your Zoom meeting directly through Google. Here’s a step-by-step guide to set up and use the new Zoom for GSuite Add-On.
1. Install the Zoom for GSuite Add-On

To get started with Zoom for GSuite, you’ll first need a Zoom account and a Google account. If you have both, go to the Google GSuite Marketplace and search for the Zoom for Gsuite Add-On. You can also directly access the Zoom for GSuite download page by clicking this link.
This Goole Workplace Marketplace page highlights the add-on’s key features, shows customer reviews, and provides additional information for those looking to integrate their Zoom and Google clients.
Click to install the Zoom for GSuite Add-On. A sign-in pop up will appear. Choose the Google account you’d like synced with Zoom. By logging in, you are are to Zoom for Google Calendar’s privacy policy and terms of service. Make sure you familiarize yourself with the terms before agreeing!
After logging in, you’ll get an additional pop-up. This pop-up will walk you through all the individual permissions you are about to grant to the application. While there are a lot of permissions, allowing the inter-communication between Google and Zoom will help you manage your scheduled meetings with ease.
After agreeing, the integration will begin. In the blink of an eye, it’s ready for you to use.
2. Go to Google Calendar and Sign In to Zoom
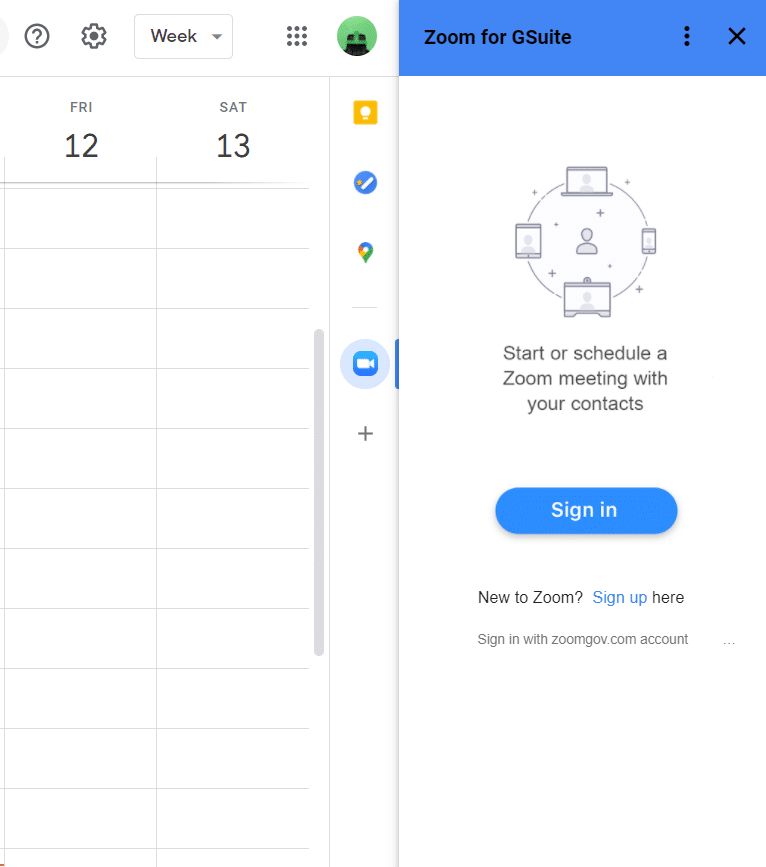
Once your add-on is installed, you’ll need to go to Google Calendar. If you followed the steps above, you’ll see the Zoom logo on the far right of your Google Calendar screen.
Once you click, a new module will show up on the right side of your screen. This area will be beneficial for integrating your Zoom and Google accounts. But first, we need to finish the connection. The first time you click the Zoom icon on your Google Calendar taskbar, you’ll be prompted to sign-in to your Zoom account. Go ahead and click sign in and enter your Zoom credentials.
3. Use the Zoom Taskbar
After signing in, you’ll now be able to start your personal meeting directly from the Zoom taskbar. But, it gets even better. The taskbar will also show you all of your upcoming Zoom meetings. Cool features such as “Start Meeting” help you start your meeting without ever leaving the Google Calendar interface. Entering your select Zoom meeting from Google is even easier with this add-on.
4. Schedule Events and Add Zoom
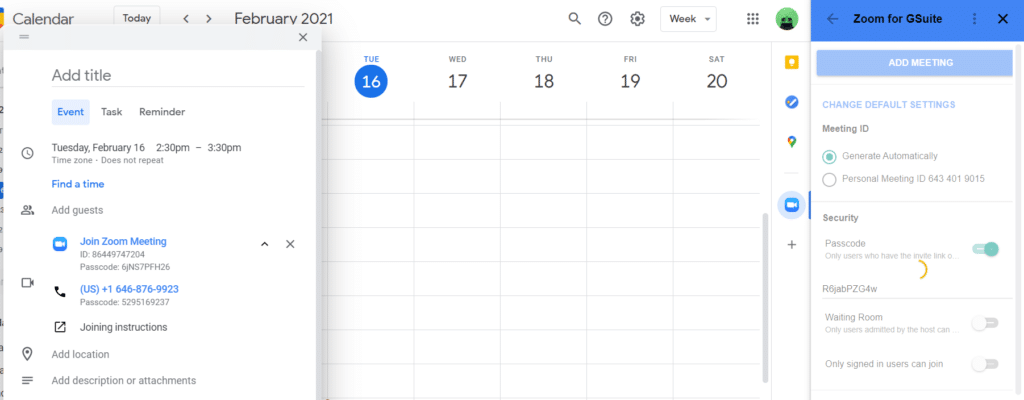
This add-on has even more to offer. While scheduling an event, you can add a Zoom meeting and edit all Zoom meeting setups, straight from Google. Here’s how to schedule and edit your Zoom meeting from Google Calendar:
- Make sure to keep your Zoom taskbar open.
- Schedule a new meeting using Google’s “Create” button on the top left side of the page.
- Click the blue arrow next to the video conferencing options and select the Zoom option
- Navigate your eye to the Zoom taskbar on the right and edit any settings you may need
5. Enjoy Easy Scheduling
These steps will help you seamlessly schedule your next Zoom meetings!