Zoom has come out with another innovative feature to help you feel more immersed during your video conference. This new feature called Immersive View is meant to provide a more realistic backdrop to panels, conferences, or large-group video calls. The Immersive View feature is here, here is how to use it! Please note, you must have the Zoom Desktop App version 5.6.3 or later for this feature to work.
What is Zoom Immersive View?
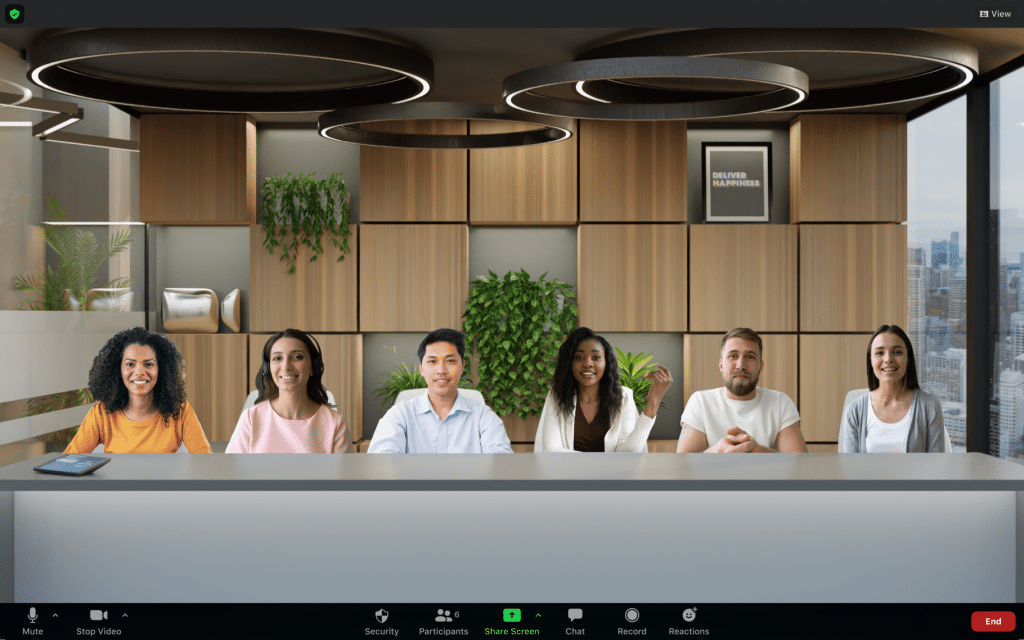
Zoom Immersive View is a new feature available for your zoom video conference calls. The Immersive View “allows hosts to arrange video participants and webinar panelists into a single virtual background, bringing people together into one scene to connect and collaborate.” In other words, all of your Zoom call participants can now be in the same virtual “room”. Zoom Immersive view works with up to 25 participants. This level of capacity means you can take a large-scale virtual event and make it seem like the real thing! Ready to start using this new Zoom meeting feature? Let’s get started.
How to Enable Zoom Immersive View
First off, the Immersive View feature needs to be enabled by the Zoom account administrator. If you have a personal Zoom account, you’re likely the account administrator. If not, you’ll need to check with your company and request that the administrator with permission to edit account settings to turn this feature on.
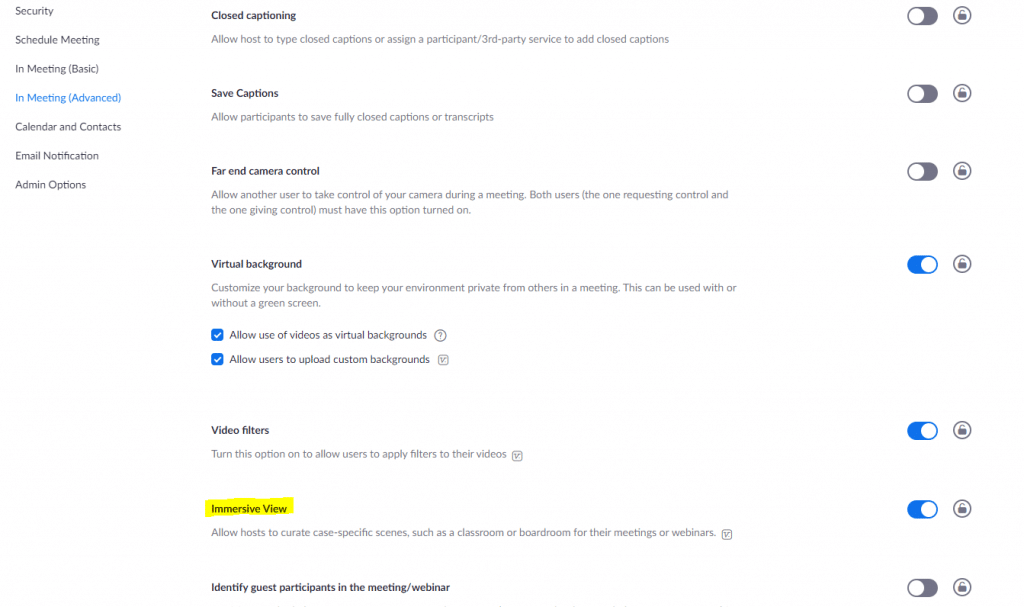
To enable this feature, you’ll first need to go into Account Management and then the Account Settings area. From there, navigate to the Meeting tab (found under the In Meeting) area, and find the Immersive View option and verify it’s enabled. From personal experience, I was unable to find the Account Management area within the Zoom Desktop App. To access the Account Management settings, I had to first click on my profile icon in the desktop app, select “My Profile” and then navigate within the new window to the Account Management settings area under Admin.
FYI: This setting is automatically enabled for Free and single Pro accounts. It is automatically disabled for all other account types.
How to Use Zoom Immersive View
Now to the fun part, actually using this feature. The key to properly using Immersive View is to ensure you are the “host” of the meeting. You will not be able to turn on the feature for your zoom rooms unless you are the host.
Start your meeting as you normally would. Immersive View works for both meetings and webinars. In the top right corner of your Zoom app, you’ll click View (the icon looks like three small boxes atop a larger box). From there, click Immersive. The Zoom Immersive View Settings box will show up. You’ll then be asked to select from the following options: automatically place participants or manually place participants.
Automatically placing participants will include as many participants as possible (up to 25 people) in the scene you select. You can then swap out or rearrange participants after the selection.
Manually placing participants will prompt you to add or remove participants as you wish. If you select more than are allowed for a particular scene, extra participants will be removed.
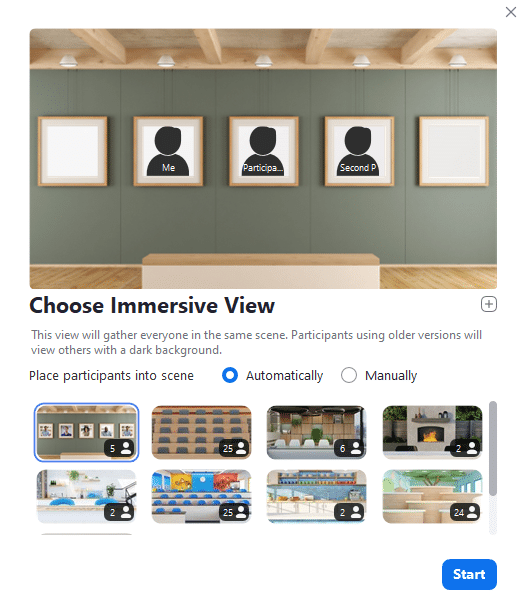
As of May 2021, Immersive View does not allow you to customize your background. It does however have multiple different room options. The different rooms include a lecture hall, fitting up to 25 people, all the way to a living room with a fireplace for only two participants. Select the best background for you and click “Start“. Your participants will now see the video feeds of others in this new format.
How to Change or End Immersive View
How to Change Immersive View Settings
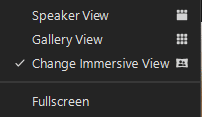
A neat thing about the way Zoom’s settings work is that to edit your Immersive View, you can simply follow the same instructions as for how to turn it on. Once Immersive View is turned on, the View tab setting will change from “Immersive View” to “Change Immersive View“. Simply click that option and the Immersive View settings will reappear. Any selection you make will be reflected as soon as you click “Start“.
How to End Immersive View
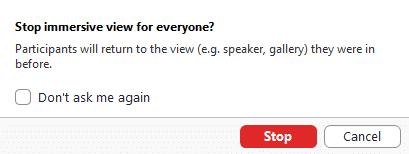
A not so neat thing about Zoom’s settings is that you can’t stop Immersive View the same way you start it. To end Immersive View but keep the meeting going, you’ll need to click back to another View option. After clicking, the system will ask you if you’d like to stop the view for everyone. Select “Stop” and the view will end. You can select “Don’t ask me again” and your view will automatically change by toggling between options.
Additional Considerations
Limitations
- Zoom Immersive View and screen sharing can not occur at the same time. When screen sharing begins, the immersive view will be replaced by the shared screen. Once screen sharing ends, Immersive View will resume.
- Recording the Immersive View is not available, yet.
- The Immersive View works on mobile devices (as a participant) but can only be enabled and started on a desktop.
- Immersive View does not allow you to customize the virtual background.
- When using Immersive view during a webinar, participants will see an immersive view consisting of the Host and Speakers.
System Requirements
As of the date of this article, the following are the necessary system requirements to properly run the Zoom Immersive View feature. For the most up-to-date system requirement information, please visit Zoom Support.
- Zoom desktop client
- Windows version 5.6.3 or higher
- macOS version 5.6.3 or higher
- Zoom mobile app
- Android version 5.6.3 or higher
- iOS version 5.6.3 or higher
- For macOS: OS version 10.13.3 (High Sierra) and above
Note: The mobile apps can also participate in Immersive View, but it must be started by a user on the desktop client.