


- Open the Zoom Desktop Client.
- Select New Meeting (With Video On).
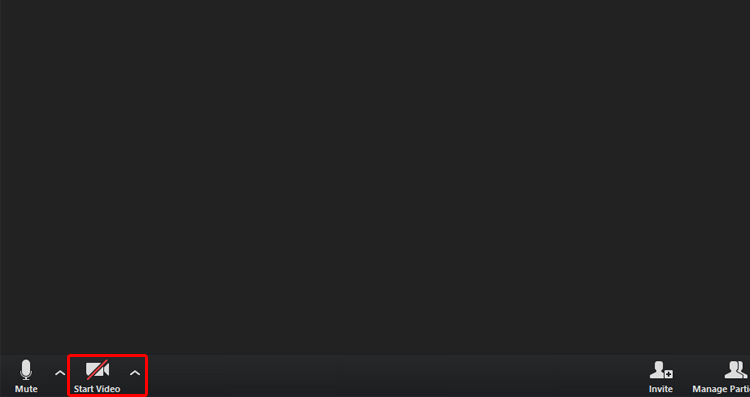
- Once you are in the meeting room, navigate to the bottom left to the video icon.

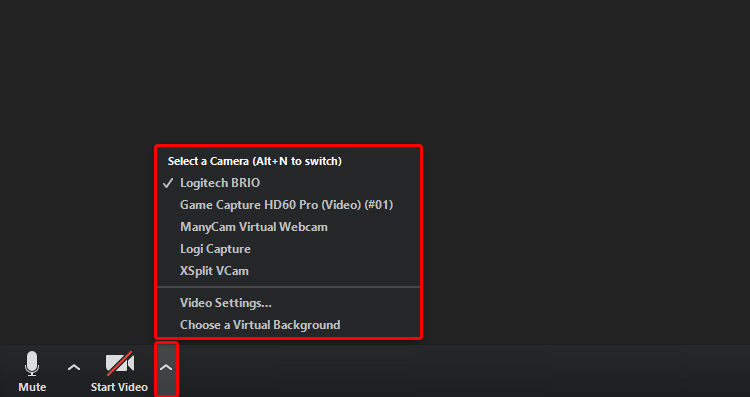
- Click the arrow up and you should see a list of available cameras.
- Select your camera from the list.
- You should now have your camera displayed and ready for your meeting.
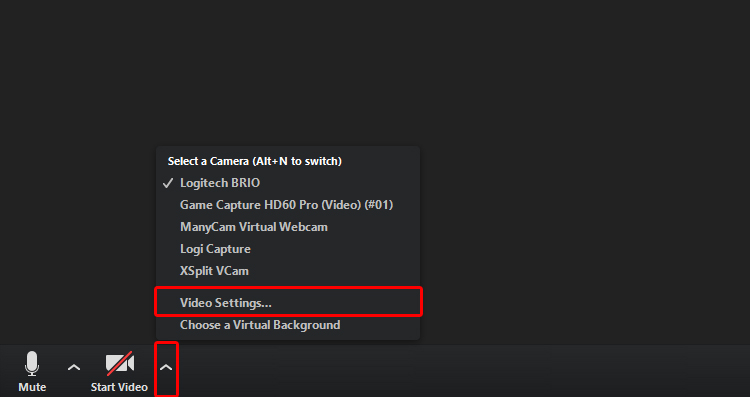
- Navigate to the video icon at the bottom left.
- Click on the arrow up icon and select Video Settings.
- On the Video tab, you can adjust the mirror effect and meeting video settings.
To adjust the camera zoom, resolution, etc., you’ll want to install your webcam’s software from the manufacturer’s website.
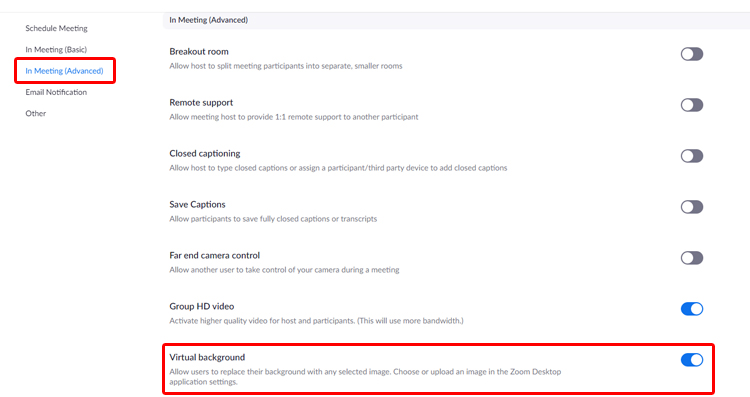
Zoom requires that you or your administrator enable virtual backgrounds for your account. You will need to enable the setting before it will show up as an option on the Zoom Desktop Client.
Toggling the Virtual Background
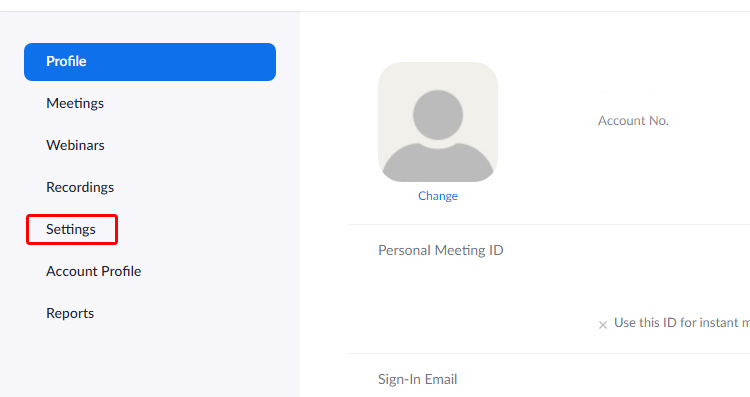
- Navigate to Zoom.us and sign into your account.
- On your Account Profile Page, select Settings from the left sidebar.
- On the Meeting tab, select In Meeting (Advanced) from that tab’s sidebar.
- Scroll down to Virtual Background and toggle the option.
Setting up the Virtual Background
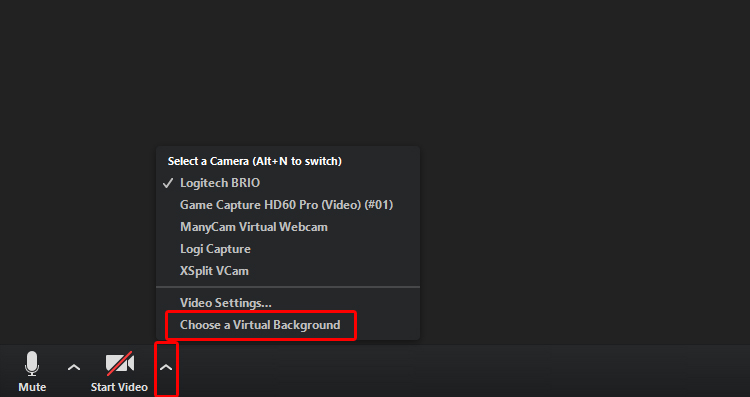
- Open the Zoom Desktop Client and select Start with Video.
- Navigate to the bottom left video icon.
- Click the arrow up icon and select Choose a Virtual Background.
- The Virtual Background Settings window will now pop up.
- On this window, select or upload the image that you’d like to use as your background.
- Your background should now begin to chroma.

If the chroma key is not even, don’t worry. There are some items that you can check to help with better coverage.
- At the bottom of the settings window, you’ll see a small box. Click that box and pick the most consistent green on the Webaround.
- Ensure that you have proper lighting. Ideally, you’ll have two lights pointing at 45° angles. Lighting helps provide a more even color across the board, which leads to a better chroma key.
All chroma key settings will differ from user to user. Individuals using chroma key should take time to tweak their setting based on their lighting and environment.
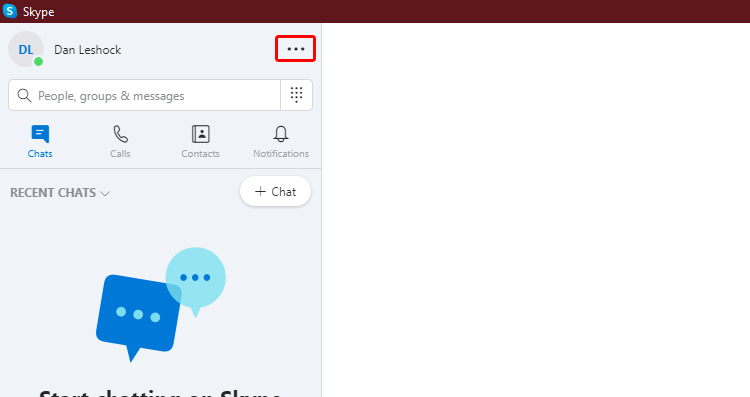
- Open up the Skype Desktop client.
- Navigate to the left sidebar and click on the triple dot icon.
- Choose Settings.
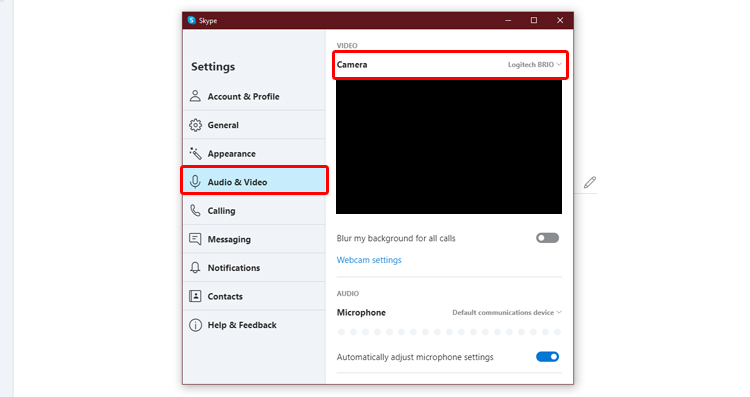
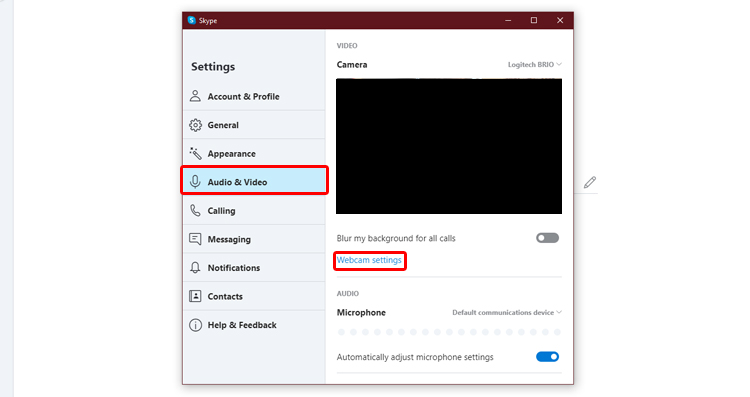
- Navigate to the Audio and Video tab on the Settings sidebar.
- At the top, next to Camera, you’ll see a camera dropdown menu. Click this and select your camera from the list.
If you are using Manycam, you’ll select Manycam Webcam as your source. - You have now added your camera as the default camera in Skype.

- Navigate to the left sidebar and click on the triple dot icon.
- Choose Settings.
- Navigate to the Audio and Video tab on the Settings sidebar.
- Click Webcam Settings.
- Here you’ll find the webcam settings, which allow you to change the brightness, contrast, hue, video decoder, etc..
To adjust the camera zoom, resolution, etc., you’ll want to install your webcam’s software from the manufacturer’s website.
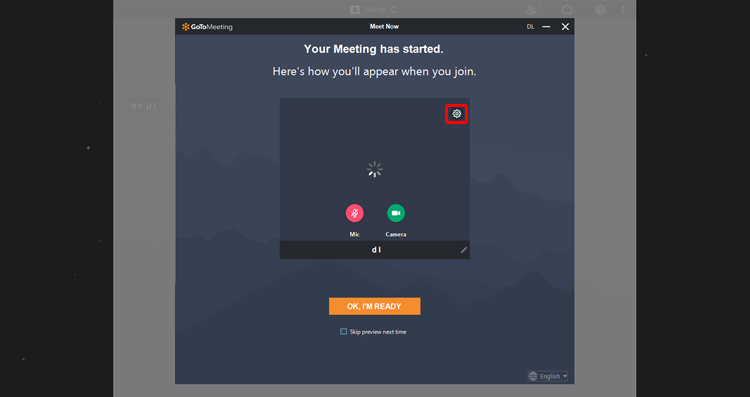
- Open up the GoToMeeting Desktop client and start a meeting.
- When you are in the main meeting room, navigate to the top right and click the cog icon.
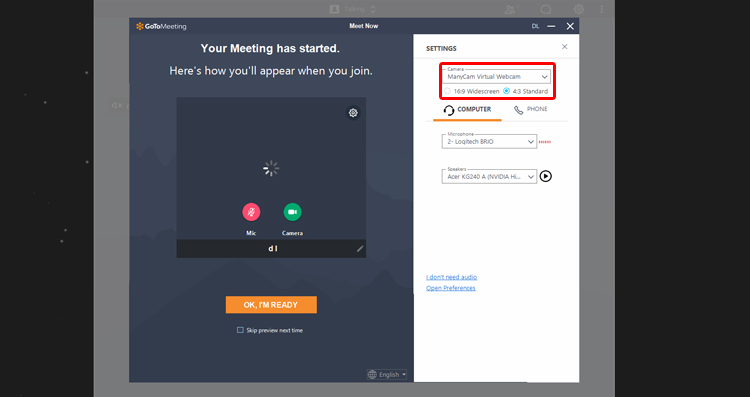
- On the top of the sidebar, you have your webcam dropdown box. Click this and select your camera.
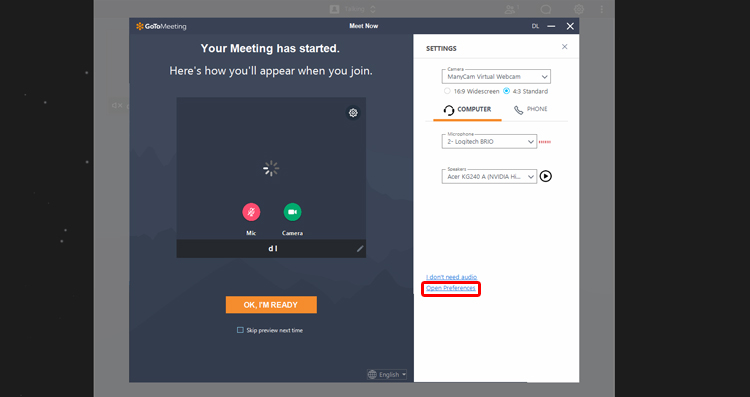
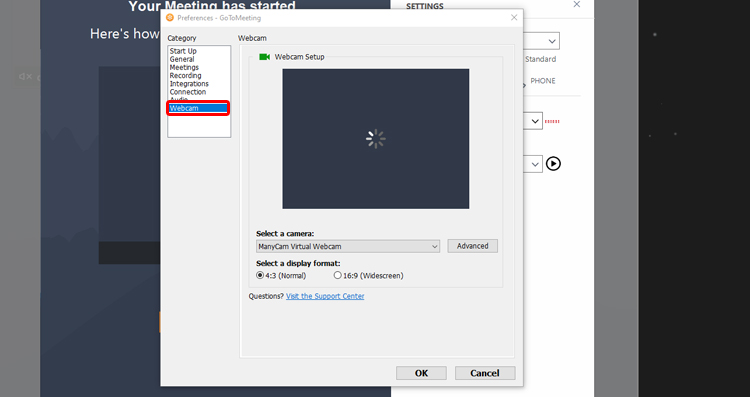
- Navigate to the top right and click the cog icon.
- At the bottom of the Settings sidebar, click Open Preferences.
- On the Category sidebar, click Webcam.
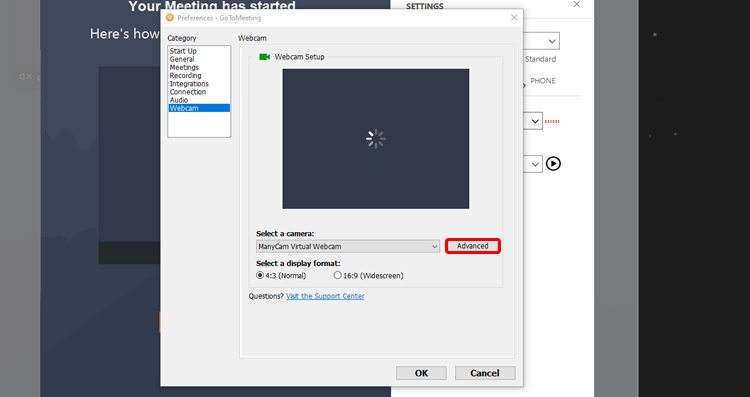
- Next to the camera dropdown menu, select Advanced.
- Here is where you’ll be able to adjust the camera’s control and overall look. If the button leads to nothing, you may need to install your webcam’s software. Consult your webcam manufacturer’s website for the correct download.
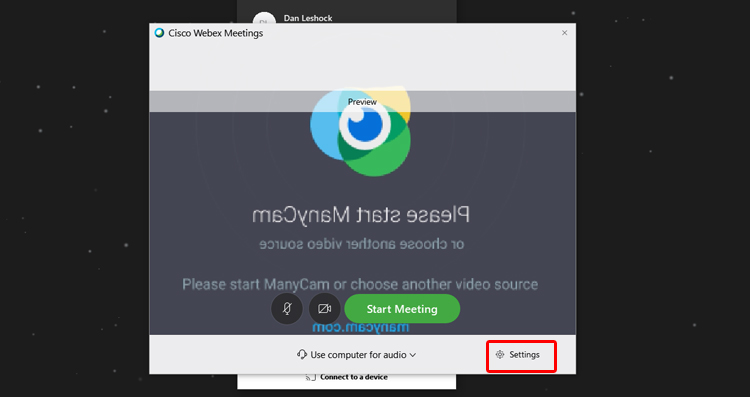
- Open up the Webex Desktop client.
- Start a meeting.
- Navigate to the bottom right and select Settings.
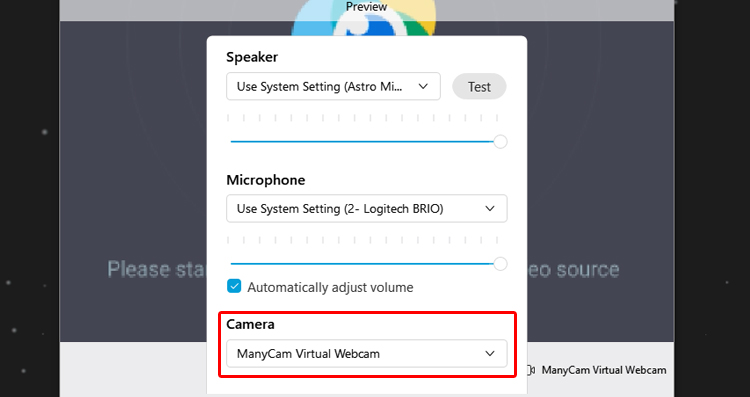
- At the bottom of the Settings window, select the camera dropdown menu and select your camera from the list.
- Open up the Vidyo Desktop client.
- Join your meeting room.
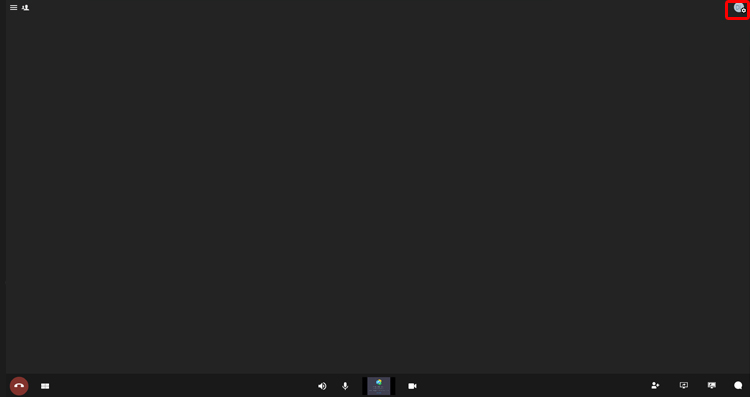
- At the top right, click on your account photo with the cog icon.
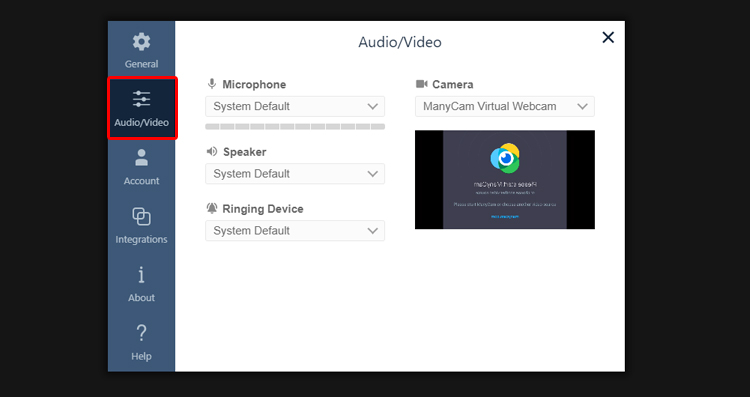
- A Settings Window will open. On the left sidebar, select Audio/Video.
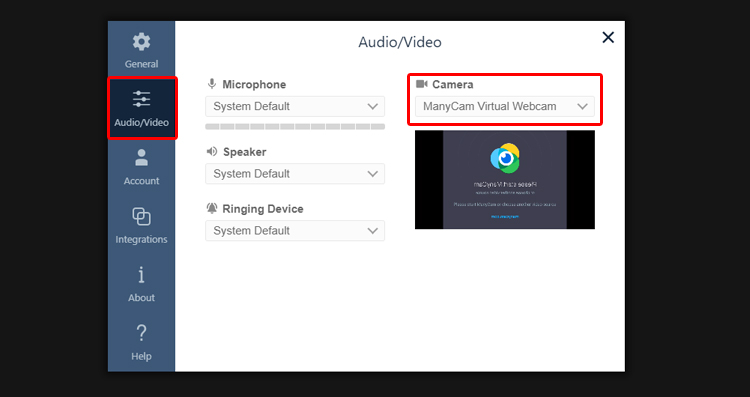
- On the right side of the window under the Camera section, click the drop-down menu and select your camera from the list.
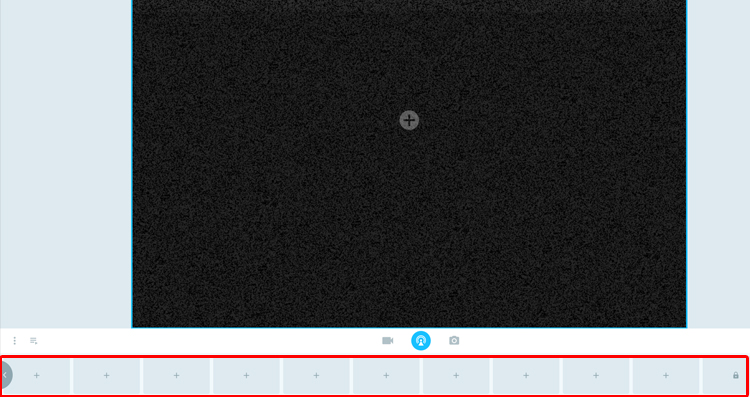
- Open up Manycam
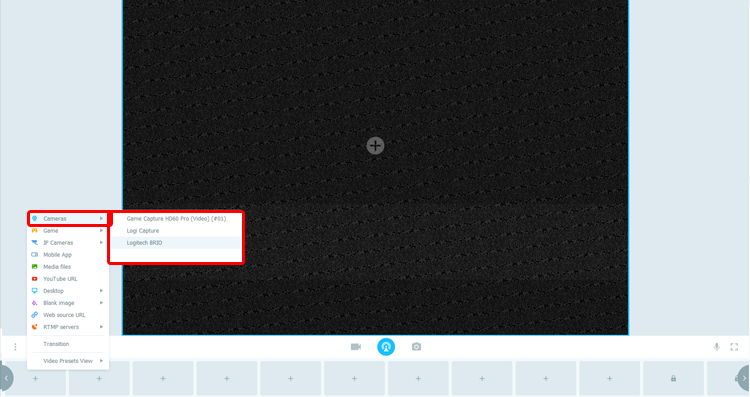
- Navigate to the bottom boxes with “+” marks in them.
- On the first box, click it, navigate to Cameras, and select your camera from the list.
- Ensure you are on the scene with your camera.
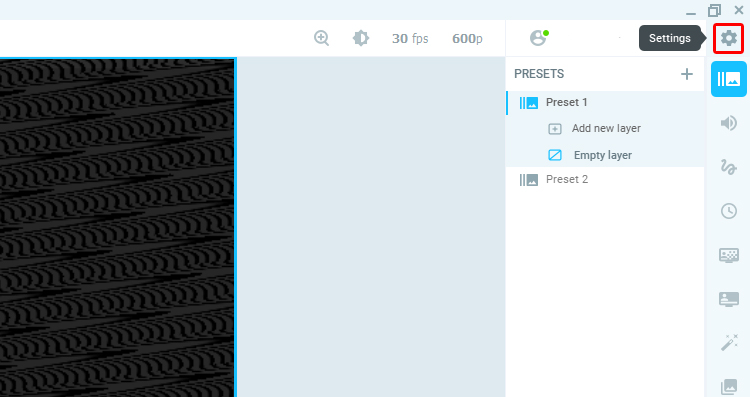
- Navigate to the cog icon at the top right and click.
- On the left sidebar, select Video.
- Here, you’ll be able to adjust the resolution and frames per second.
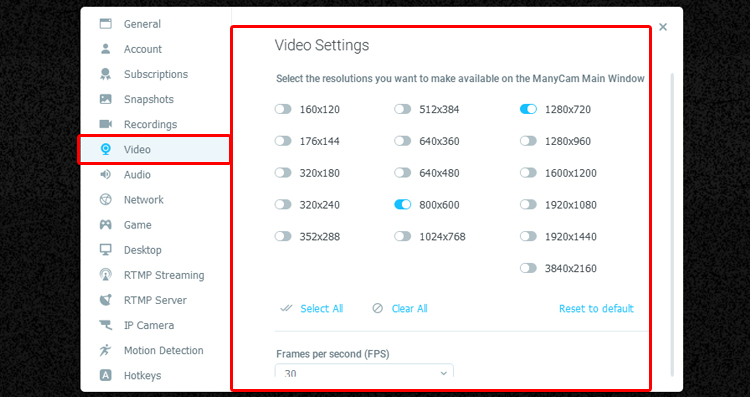
To adjust the camera zoom, brightness, contrast, etc., you’ll want to install your webcam’s software from the manufacturer’s website.
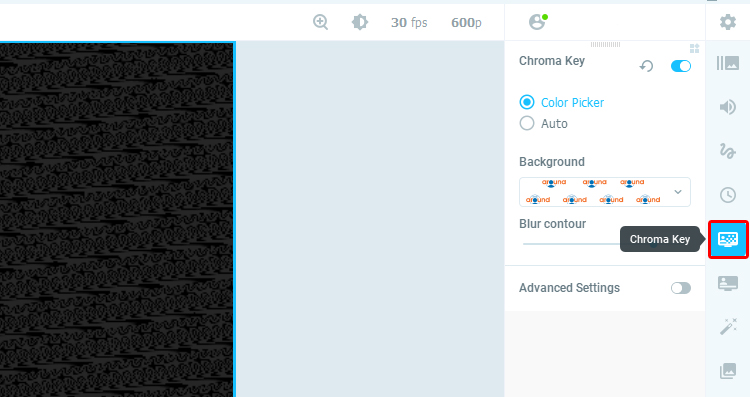
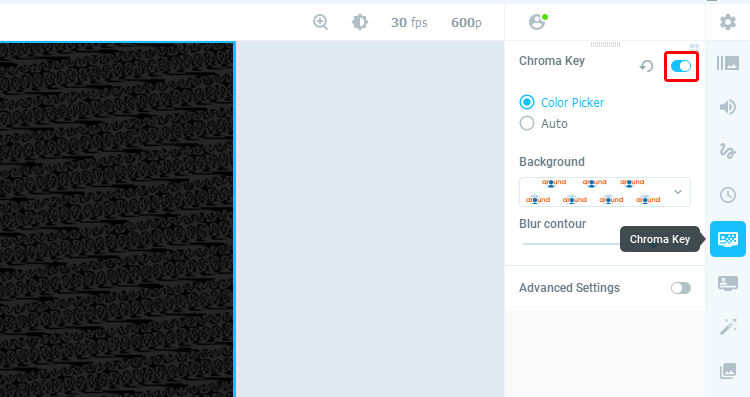
- On the right sidebar, navigate to the Chroma Key tab.
- Toggle the Chroma Key.
- Here you are able to adjust settings like if Manycam finds the best color or you choose for what to chroma key. You are also able to add your own background here.
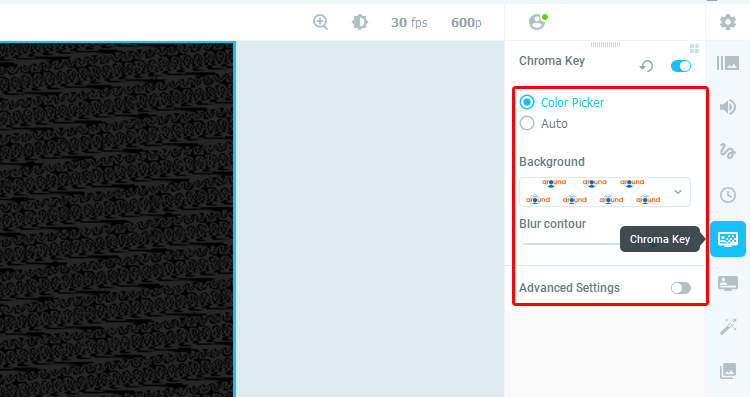
All chroma key settings will differ from user to user. Individuals using chroma key should take time to tweak their setting based on their lighting and environment.
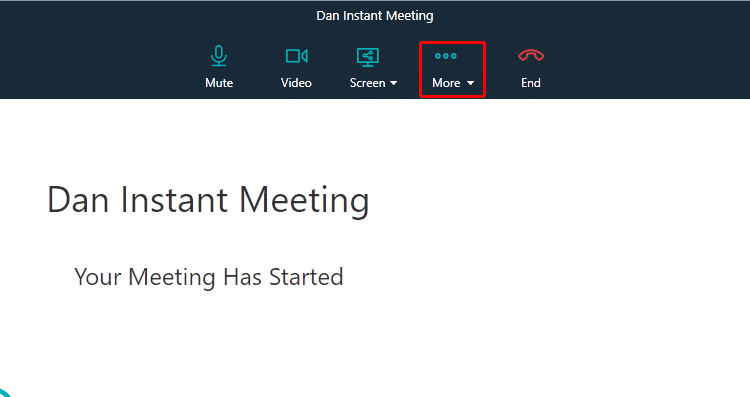
- Open up Amazon Chime.
- Navigate to “More” at the top meeting bar.
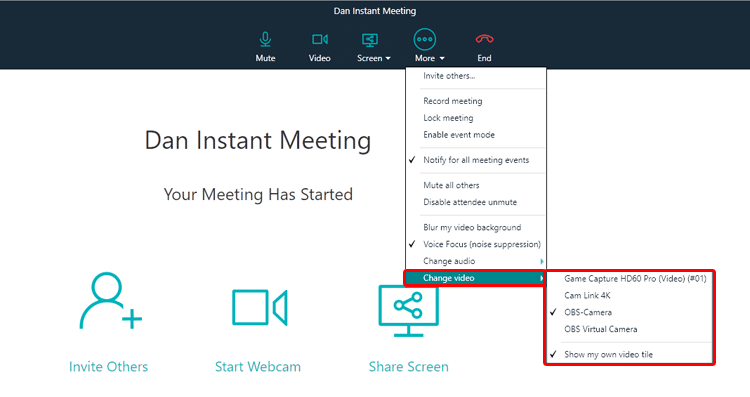
- Click “More” and navigate to “Change Video”. Select the camera you’d like to use.
- Start your Google Meet meeting.
- Navigate to the triple dot icon.
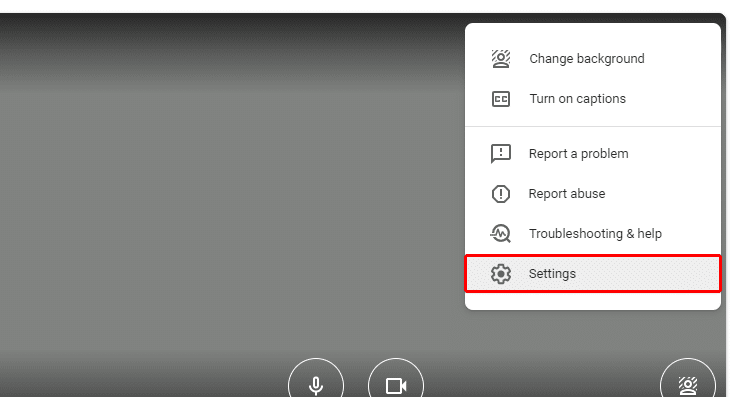
- Select the triple dot icon and navigate to “Settings”
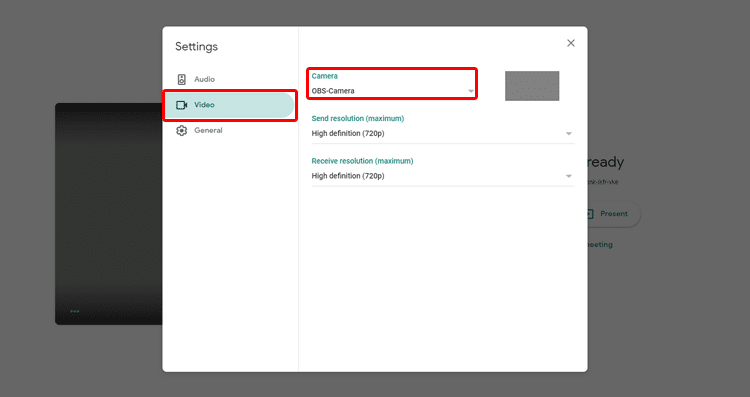
- On the left sidebar, select “Video”
- Select your camera from the camera dropdown menu.
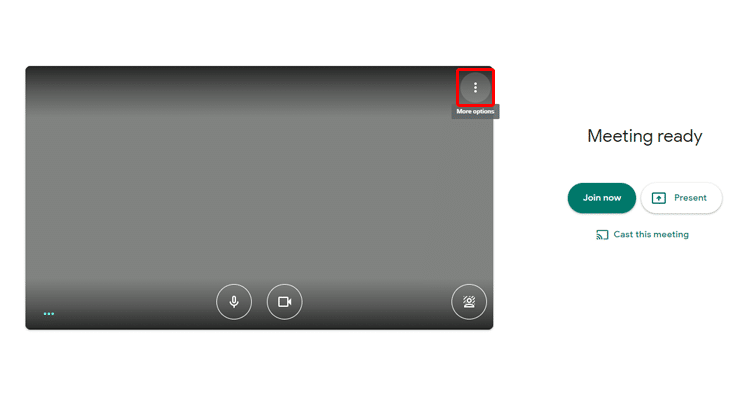
- Start your Google Meet meeting.
- Navigate to the triple dot icon.
- Select the triple dot icon and navigate to “Settings”
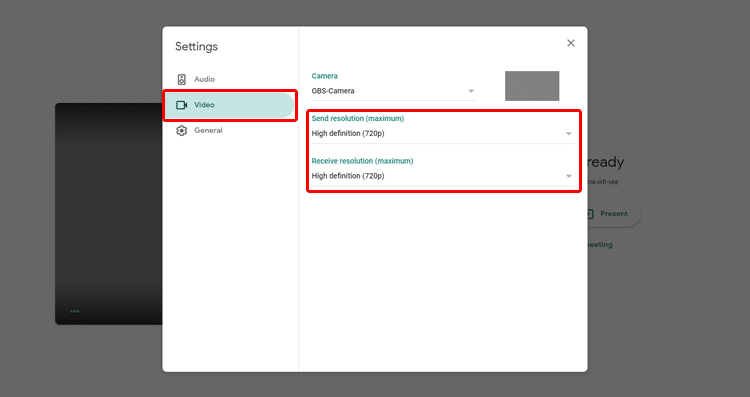
- On the left sidebar, select “Video”
- Choose the Send and Receive resolution you’d like for your camera.
To adjust the camera zoom, brightness, contrast, etc., you’ll want to install your webcam’s software from the manufacturer’s website.
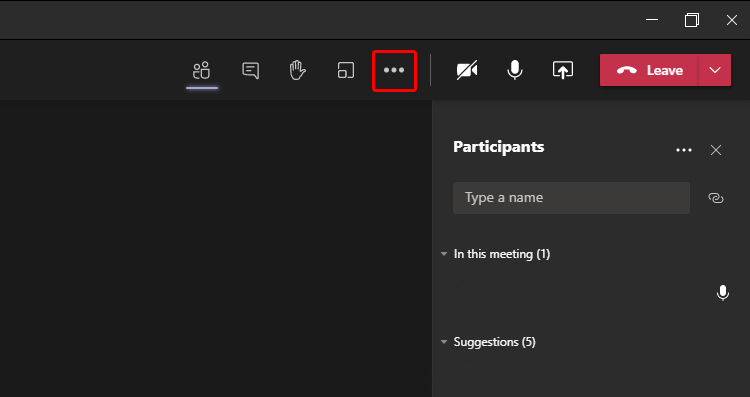
- Join a Microsoft Team’s meeting.
- Navigate to the triple dot icon.
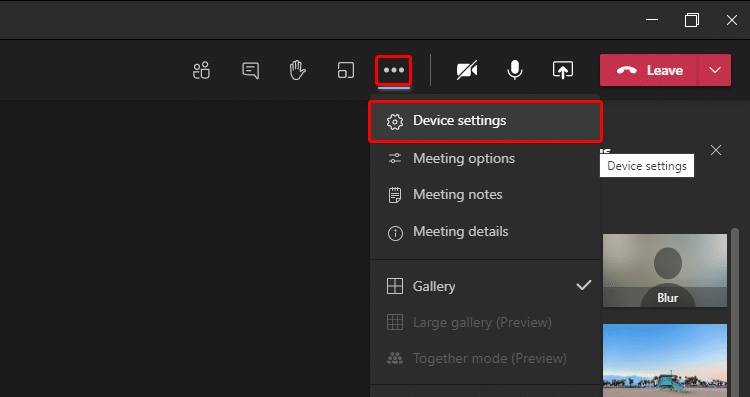
- Select the triple dot icon and navigate to “Device Settings”
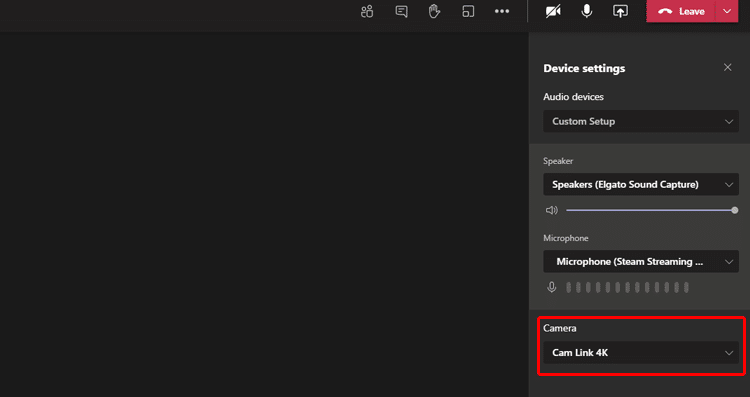
- On the right sidebar, you can now select the camera you would like to use.
Microsoft Team’s is rolling out their virtual background support to accounts. If you don’t have access, check back at a later date to see when if its enabled for your account.
- Join a Microsoft Team’s meeting.
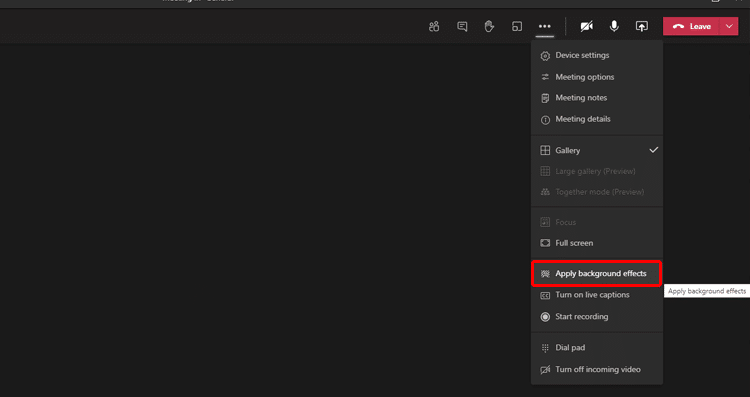
- Navigate to the triple dot icon.
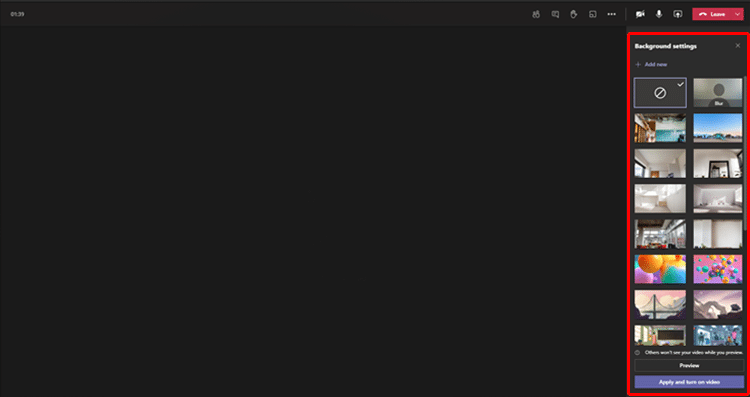
- Select the triple dot icon and navigate to “Apply Background Effects”
- On the right sidebar, you can now select the image you want to be applied.
- Once you are finished choosing the image you want to use, click “Apply and Turn on Video”
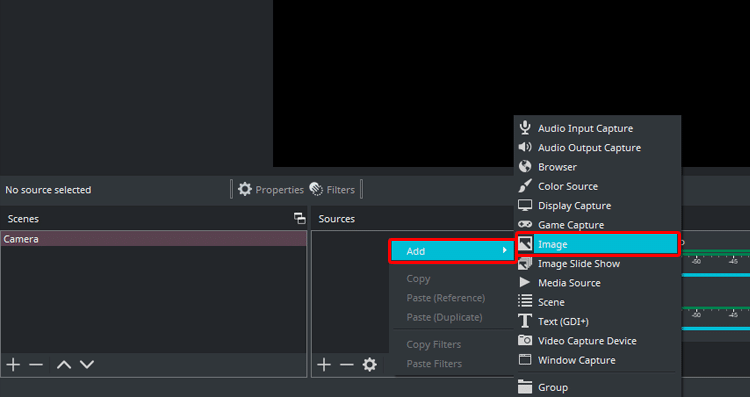
- Navigate to the Sources box.
- Right click in the Sources box, hover over “Add”, and select “Image”.
- Name the Image source whatever you’d like.
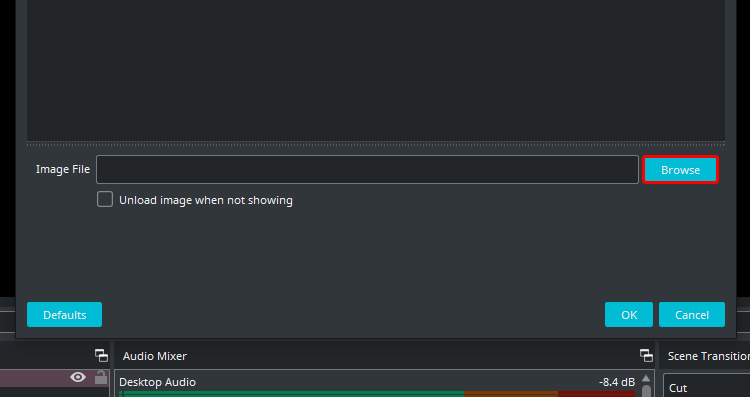
- In the “Image” Properties window, select “Browse”.
- Select the image you want to use for your virtual background.
- Click “Ok”.
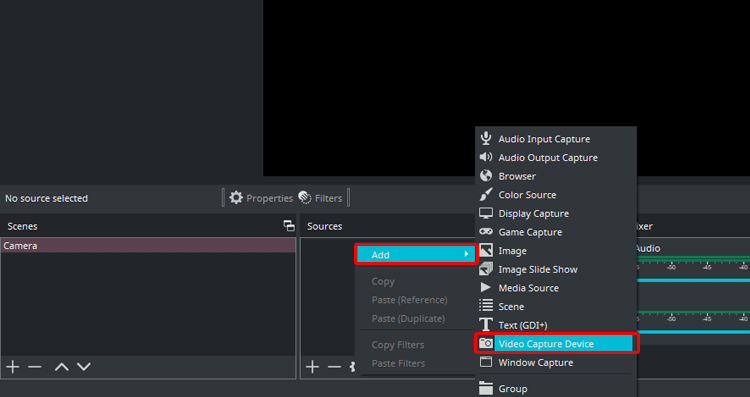
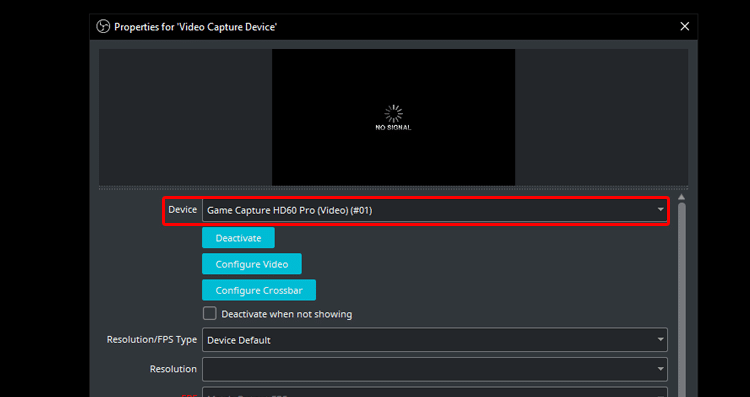
- Right click in the Sources box, hover over “Add”, and select “Video Capture Device”.
- Name the Video Capture Device source whatever you’d like.
- In the “Devices” dropdown, select the camera you’d like to use.
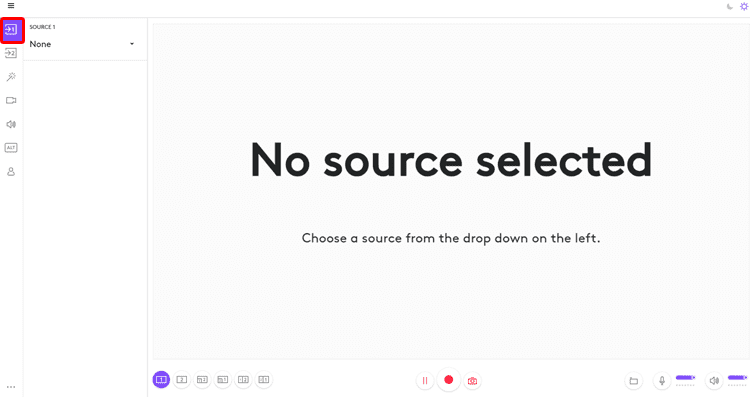
- Open Logitech Capture
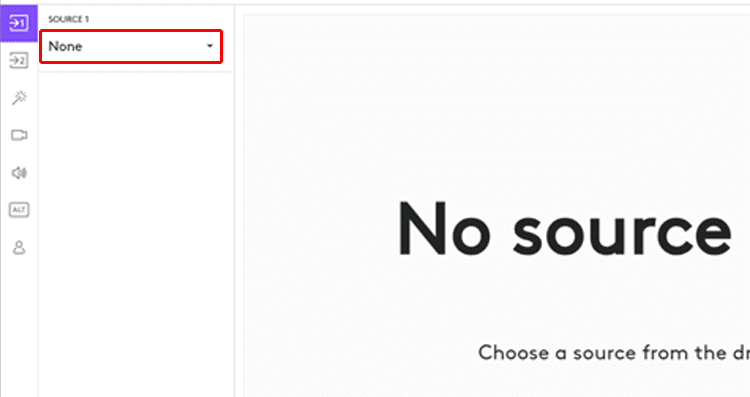
- On the left sidebar, select Source 1.
- Hover over “None” and click into the dropdown.
- Select your webcam from the dropdown menu.
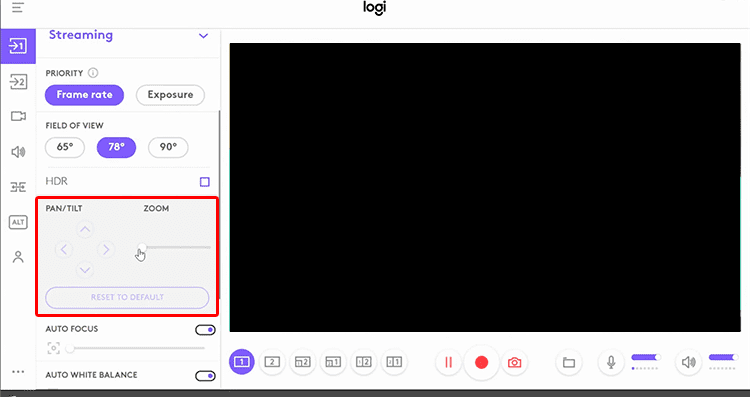
- Click on Source 1 box.
- In the Source 1 settings sidebar, scroll down until you reach “Pan/Tilt and Zoom”
- Here, you can change the zoom and pan/tilt of the webcam.
- Navigate to your preferred meeting software.
- Within the software, navigate to where you choose the camera you’d like to use.
- In the camera selection, choose “Logi Capture”. This is the virtual camera for Logitech Capture. All edits (including zoom, pan, and tilt), will show up in your meeting software.
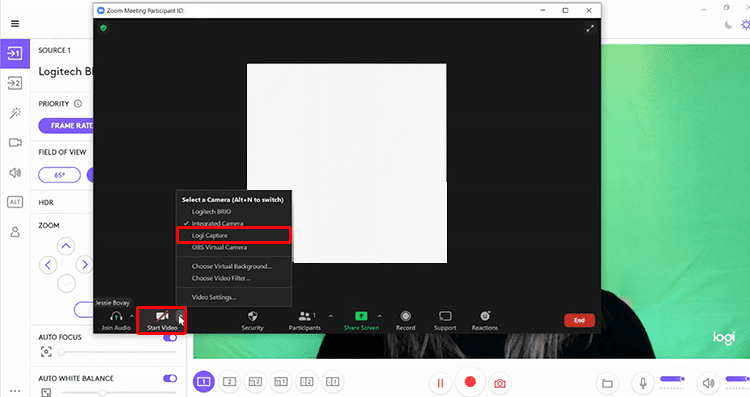
In this example, we used Zoom. However, this will work in any meeting software that allows you to pick your camera source.